


Last week we gave you a brief introduction to the world of K2 Workflows by showing you how to create a new K2 Workflow project in Visual Studio 2013.
Now that we have an empty K2 Workflow project to work with, we can start to create the workflow.
A K2 Workflow consists of components dragged and dropped from the Toolbox onto the Designer and then connected with lines that indicate the flow. In this blog we’ll discuss one of these components: the Default Client Event.
K2 Automated Testing Software
BenchQA allows full test automation of K2, including fully automated K2 SmartForms and K2 Workflow testing. It promotes test driven development for K2 and ensures continued quality assurance for K2 solutions. Easily apply changes to test cases to accommodate changes to K2 apps and ensure all apps are regression tested to avoid defects and assure continuous quality.

The Default Client Event is used to create Tasks for designated users in the K2 Workflow system. Tasks are assigned to specific users, and have to be completed before the workflow can continue flowing.
In order to find this component, open up the Toolbox and navigate to the “Event Wizards” section. Find the component labelled “Default Client Event”, and drag and drop the component onto the designer.
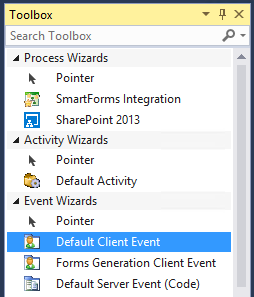
Figure 1 – Default Client Event in the Toolbox
As soon as the component is dropped onto the Designer, the Default Client Event Wizard will automatically appear.
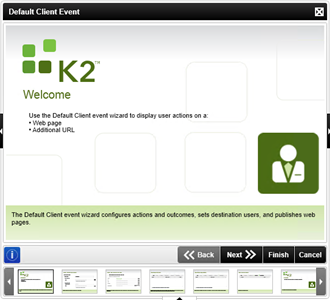
Figure 2 – Default Client Event Wizard
Use the “Back” and “Next” buttons to navigate through the steps in the Wizard. On the first page of the Wizard, click the “Next” button.
Specify a name for your event by entering one in the “Event Name” textbox. This is the name that will appear in the Task List once the task is assigned to a User.
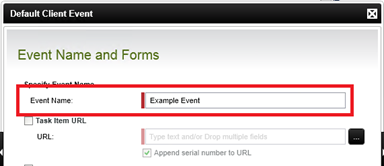
Figure 3 – Event Name
Now we need to associate a Smart Form to this event. We do this by referencing the URL of the Smart Form. Make sure the “Task Item URL” checkbox is checked. This will enable the URL field. Click on the “Browse” button to the right of the URL field in order to open up the “Context Browser”.
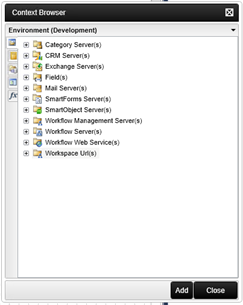
Figure 4 – Context Browser
Using the context browser we will find the Smart Form we’d like to use and associate it to the event. An import thing to note at this point is that the K2 Environment you are using to develop the K2 Workflow might be completely different to the K2 Environment that will ultimately be hosting your application. So instead of hardcoding the Smart Form Server URL, we will use the Smart Form Server URL tag from the Context Browser. This will always point to the Smart Form Server URL in the applicable K2 Environment.
Click on the “Environment” tab in Context Browser. Next expand the “SmartForm Server(s)” Tree Node and drag-and-drop the “SmartForm Runtime” object to the URL field.
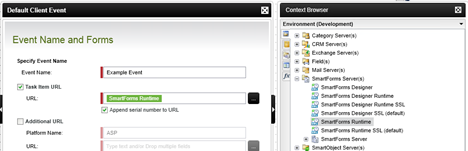
Figure 5 – SmartForm Runtime
We also have the option of manually adding to the URL, as in the following example:
Seeing as we would like to reference a Smart Form called ReportData we’ll add “/Form/ReportData” to the end of the URL
Figure 6 – Adding Forms to the URL
Each task that is created is assigned a serial number. It might be useful to send this serial number along with the URL so that it can be retrieve on the Smart Form’s side. Check the “Append serial number to URL” checkbox. Now click on the “Next” button.
The next screen titled, Event Notification Settings, is used to send e-mails to users when new tasks are assigned to them. For the purposes of this blog, we will not be sending notifications. Leave the “Notify the participants when they receive a new work item” unchecked. Click on the “Next” button.
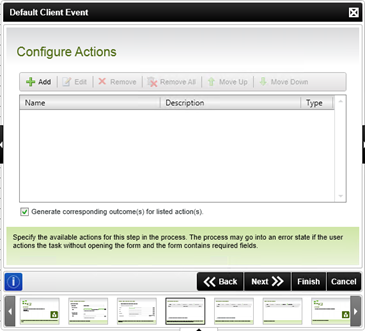
Figure 7 – Configure Actions
Now we need to configure actions. An action is an event that can be performed by the User on the specified task. In this example we will simply allow the user to “Complete” the task. Click on the “Add” button to add a new action.

Figure 8 – Adding a new Action
Enter the name of the action. In this case I will call it “Complete”. Enter a description that will make it easy for future developers to understand what the action is to be used for.
When the tasks are viewed in the “Task List”, all the actions a user may perform on a task will appear in a dropdown associated with the task. If you’d like to ensure that users open the task before performing an action on it, uncheck the “Make the action available without opening the work item” checkbox.
Not all actions are simply for completing tasks. In such cases check the “This action will update the work item” radio button. In this example we’ll leave the “This action will complete the work item” radio button checked, seeing as that is exactly what we’d like to do. Click on the “OK” button and the “Next” button.

Figure 9 – Configure Outcomes
Now that we know where the task will take us, and what actions we will be able to perform, we need to configure outcomes.
In this example the outcomes are simple. When all the assigned users have completed each of the instances assigned to them, the workflow will complete this component and move onto the next. If you’d like to take a closer look at the rules that makes this possible, select the default “Complete” outcome and click on the “Edit” button. For now, click on the “Next” button.
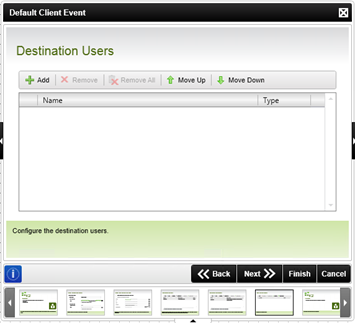
Figure 10 – Destination Users
The final step is to ensure the task is assigned to the appropriate users. The “Destination Users” page, does just that. In order to specify a destination, click on the “Add” button.
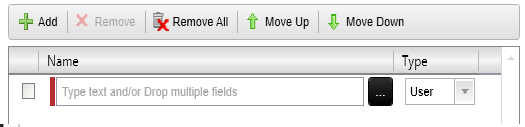
Figure 11 – Adding a new Destination
In this example we’ll assign the task to a User called “Adam”. Once the Context Browser is open, click on the “User Browser” tab, expand the “K2” Tree Node, and drag-and-drop the “Adam” user into the User field.
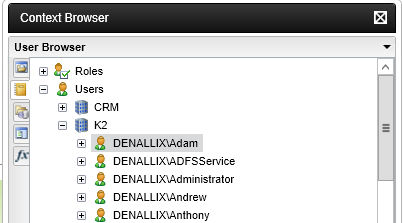
Figure 12 – Adding Adam
Now click on the “Next” button. A Simple summary is displayed that requires no action. Click on the “Finish” button.
Now that we have created a new Default Client Event you will notice that there is a new component on the Designer.
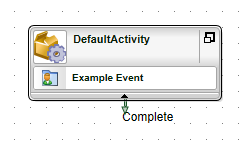
Figure 13 – New Component
Notice that the “Default Client Event” is only one component in the “DefaultActivity” box that has been added. Note that multiple events can be added to a single “Activity” which will all be executed consecutively.
Notice also how the action we created “Complete” has spawned a Workflow Line. What this means is that when the user choses to “Complete” this event, the “Complete” Workflow Line will be followed to the next component.