The SmartObject Event is used to execute methods on the desired SmartObject.
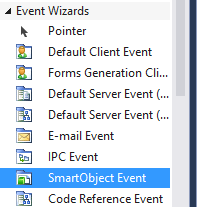
In order to find this component, open up the Toolbox and navigate to the “Event Wizards” section. Find the component labelled “SmartObject Event”, and drag and drop the component onto the designer.
K2 Automated Testing Software
BenchQA allows full test automation of K2, including fully automated K2 SmartForms and K2 Workflow testing. It promotes test driven development for K2 and ensures continued quality assurance for K2 solutions. Easily apply changes to test cases to accommodate changes to K2 apps and ensure all apps are regression tested to avoid defects and assure continuous quality.
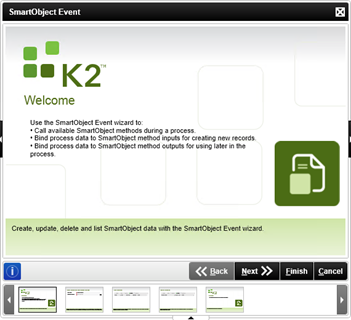
As soon as the component is dropped onto the Designer, the SmartObject Event Wizard will automatically appear.
Use the “Back” and “Next” buttons to navigate through the steps in the Wizard. On the first page of the Wizard, click the “Next” button.
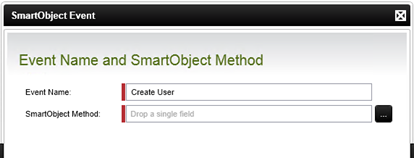
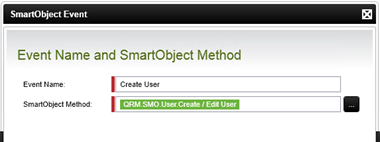
Specify a name for your event by entering one in the “Event Name” textbox. This is the name that will appear in the Default Activity so provide it with an appropriate name for easy identification later on.
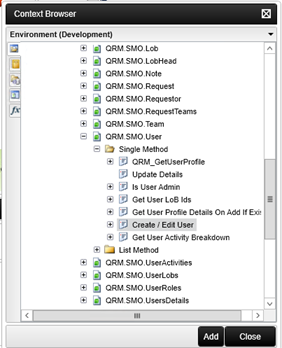
At this point we also need to specify which Method we’d like to execute. Using the Context Browser we will browse through the available Smart Objects and select the appropriate method. Click on the “Browse” button next to the Smart Object Method field.
Click on the “Add” button at the bottom of the Context Browser to add the selected Method to the “SmartObject Method” field:
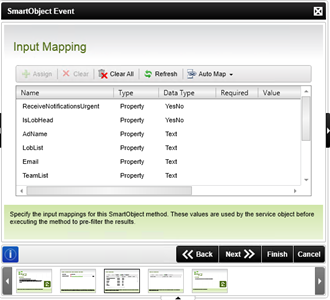
Click on the “Next” button to navigate to the “Input Mapping” window. Depending on the Smart Object you have selected, it might be necessary to fill in the input fields in order to perform the selected method. In this example I have selected the “Create” method on the “User” smart object. In order for me to create a new user, the method requires many fields to be entered.
Sometimes however even when an input field is presented, it is not necessarily required to enter the field. Focus on the “Required” column to see when a field must be entered.
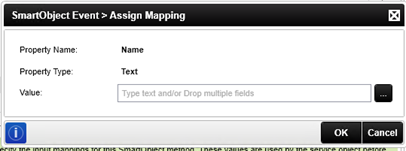
In order to enter a specific value for a field, select the field and click on the “Assign” button.
The Value of an input field could come from many different places. Using the “Browse” button, will open the “Context Browser” in which case your value could from any data source associated with K2 whether it be Share Point, a CRM or even executing another method on a different Smart Object and using the return value. It could also be as simple as entering a plain text value.
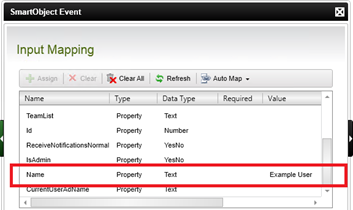
Once you’ve selected or entered a value for the selected field click on the “OK” button.
Once you are happy with the values and you’ve entered values for all the fields you need to. Click on the “Next” button.
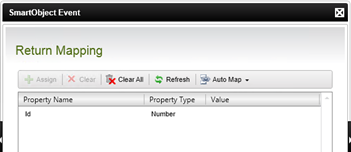
Often the method you are executing not only requires values in order to execute, but also returns values. The next screen takes care of that aptly named “Return Mapping”.
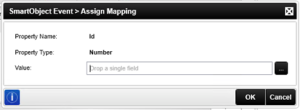
A Return value can be extremely useful. One way of dealing with a return value is to assign the value to a data field. This data field will then automatically receive the return value when the Smart Object event is executed in the Workflow. Once the data field is populated with the return value, it can be used again either as an input value for another Smart Object event, or anywhere else for that matter. In order to assign a return value, select the return field you want to edit, and click o the “Assign” button.
Once again this value can be retrieved from the “Context Browser” using the browse button. If you’d like to assign this value to a data field, open the “Context Browser”, navigate to the “Data Fields” tab, and select the appropriate data field. Click on the “OK” button to assign the Data Field to the Value, and click “OK”. Remember it is not necessary to assign values to return fields if you have no use for them. So skipping this step is perfectly fine.
Once all the return values have been taken care of (or skipped). Click on the “Next” button to finalize the “Smart Object Event”.
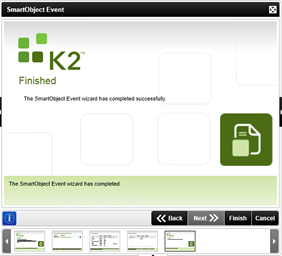
Click on the “Finish” button to complete the “Smart Object Event” wizard. Notice that a new default activity has been created on the Workflow that contains the “Smart Object Event” we have just created.


