


In a previous post we looked at how you can use Azure Blob storage as a file storage location and integrate that with your K2 application. In this post we will be looking at how you can let your application database live in the cloud.
K2 Automated Testing Software
BenchQA allows full test automation of K2, including fully automated K2 SmartForms and K2 Workflow testing. It promotes test driven development for K2 and ensures continued quality assurance for K2 solutions. Easily apply changes to test cases to accommodate changes to K2 apps and ensure all apps are regression tested to avoid defects and assure continuous quality.

The first step is to create your SQL database in Azure.
For this example I use the following settings:
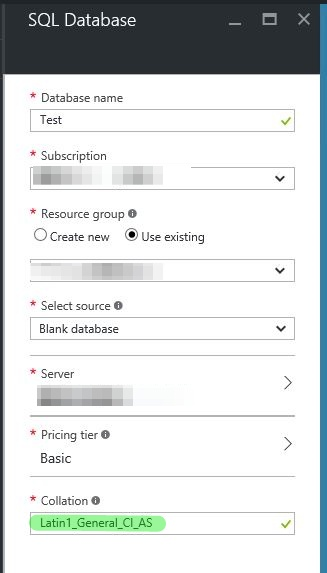
Most of the settings here are self-explanatory, the most important thing to note here is that the collation needs to be Latin1_General_CI_AS, as this is the only collation officially supported by K2.
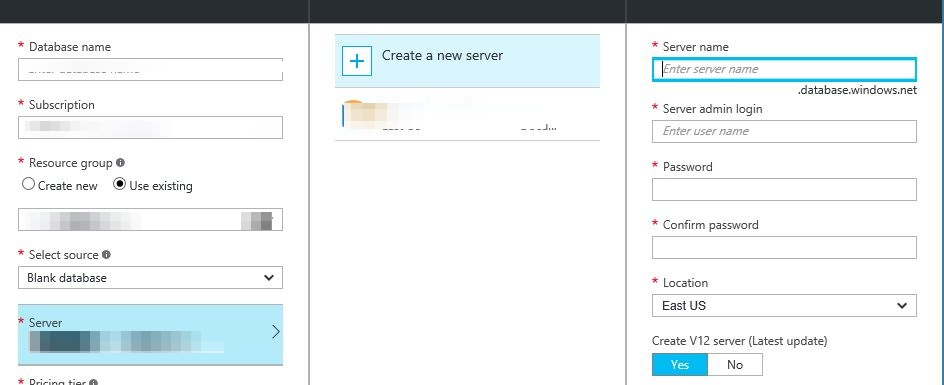
The other thing to note as that, if you have not created a SQL Server Instance yet, you can do so from here by expanding the server node, and clicking on ‘Create a new server’.
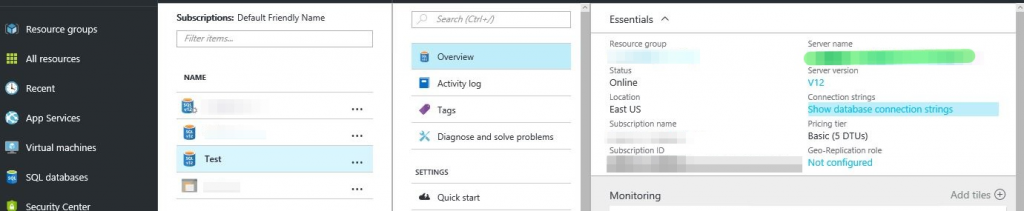
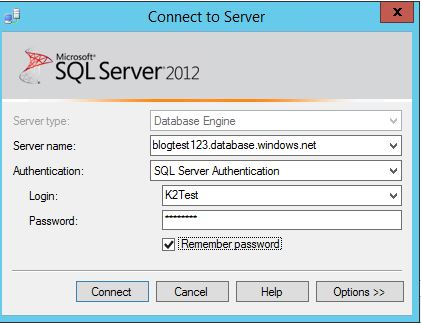
After creating the database you can open SQL Server Management studio and connect to the SQL Server you created it on. To do this you need the server name. This is easy to find by clicking on All resources > Your DB Name > Overview, and looking at the Server Name.
You can then try to connect to the database using the server name and the login credentials previously supplied, you might however first receive an error because of the SQL Server firewall in Azure not letting your IP address through.
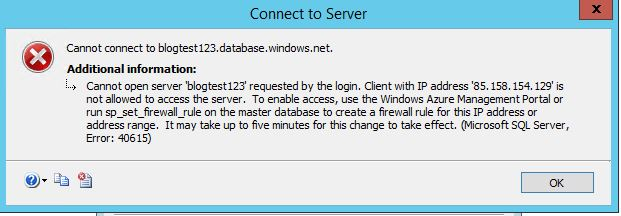
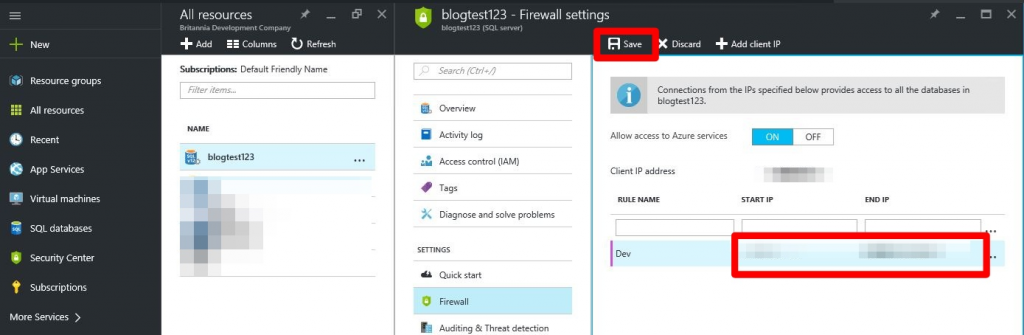
You can add you IP address to the firewall by going to All Resources > Server Name > Firewall. Add the IP and then press Save.
Now you should be able to connect to the database.
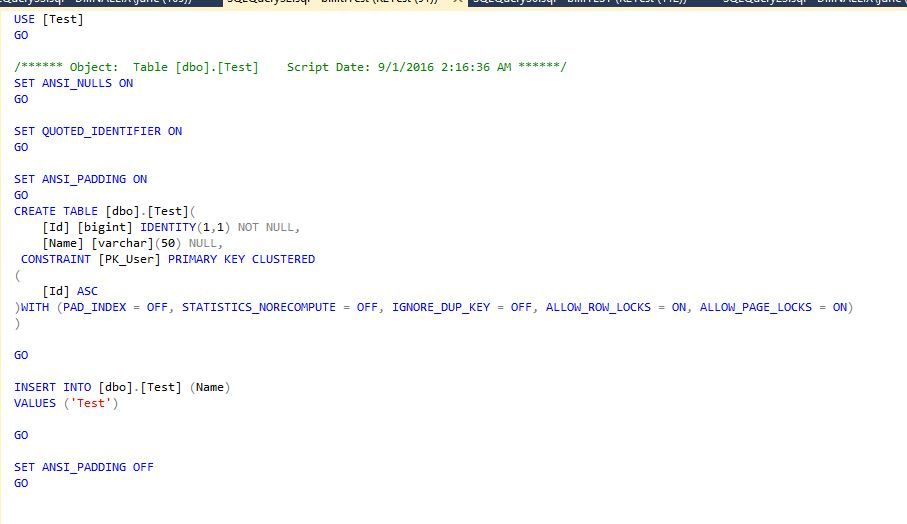
For this example I just created a simple table called Test with ID and Name columns, and added one row to it, with ID=1 and Name = Test.
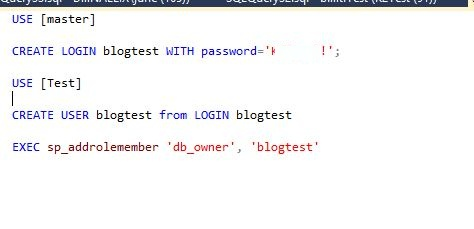
The next step is to create a login which you will be using to connect to your database from your K2 Server instance. Execute the following SQL for that.
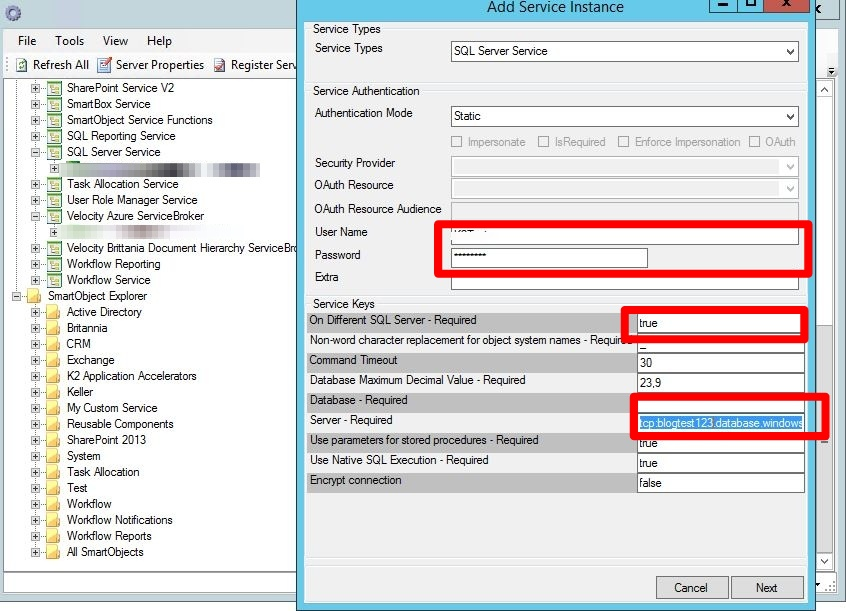
Now you are in a position to add the SQL Server Service Instance through the SmartObject and Services Tester.
The non-default settings on this screen is
On Different SQL Server – true
Database – Test
Servert – tcp:blogtest123.database.windows.net,1433
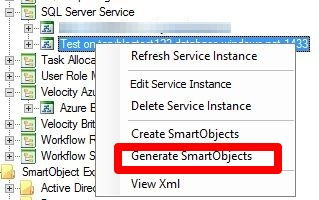
For testing purposes I am just going to Create Default SmartObjects from this Service Instance by right-clicking on the service and selecting ‘Generate SmartObjects’.
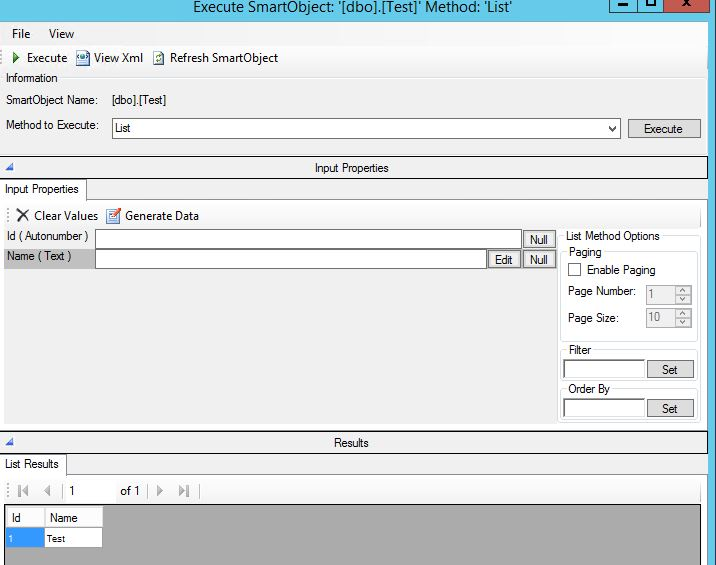
The newly created Smart Object will now be available, and we can successfully execute a read against our Azure database.

But when we try to execute the List method we will be presented with a security error!!!
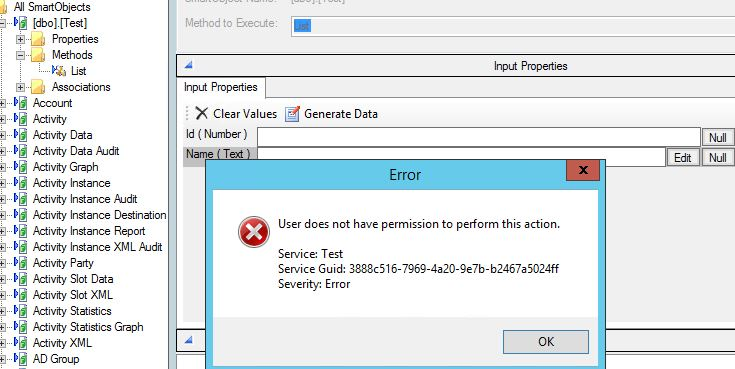
This is due to the inability of the K2Server to create a linked server.
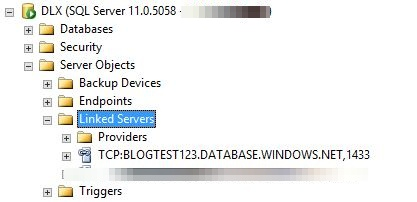
The easy workaround without having to struggle with Kerberos and all the rest is to create your linked server manually.
This can be accomplished by executing the following script against the SQL Server on which your K2 database has been installed. Please note case sensitivity, and that there is no space between the server name and the port. This is important, else K2 will not realise that the linked server already exists.

You will now notice that a Linked Server has been created in your SQL Server instance.
And finally we are in a position to execute a list method on our SmartObject
Great stuff! Our application database are in the clouds, along with our customers – now they also can brag that they have made the move to cloud storage!