


In a previous blog we discussed accessing K2 SmartObjects and their methods as well as creating and starting workflows through code. In this blog we will show how to work with SmartObject parameters in your code.
K2 Automated Testing Software
rnBenchQA allows full test automation of K2, including fully automated K2 SmartForms and K2 Workflow testing. It promotes test driven development for K2 and ensures continued quality assurance for K2 solutions. Easily apply changes to test cases to accommodate changes to K2 apps and ensure all apps are regression tested to avoid defects and assure continuous quality.

![]()
To access K2 SmartObjects you need to connect to the SmartObject Client Server:
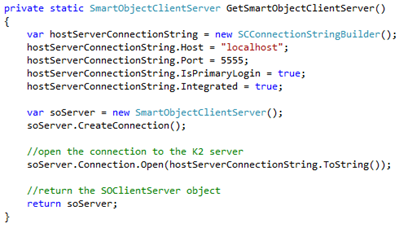
K2 SmartObject Client Server Connection
The K2 SmartObject and its methods will look as follows:
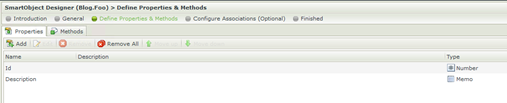
K2 SmartObject Properties
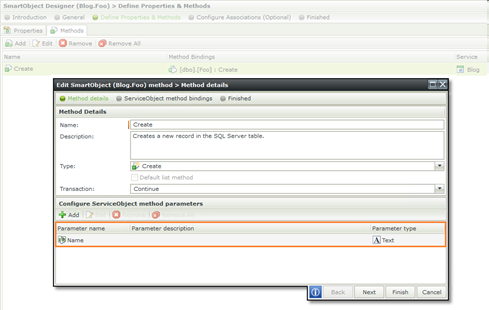
K2 SmartObject Method Parameter
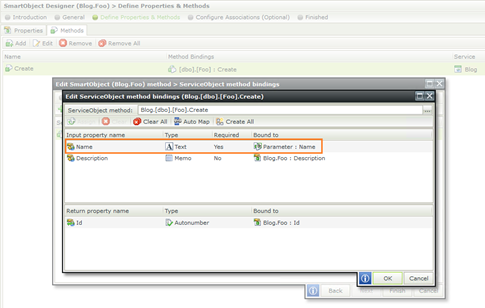
K2 SmartObject Method Mappings
Same as before, once you have established your connection to the SmartObject Client Server you need to “Get” the SmartObject and specify the input properties.
To be able to pass through a SmartObject parameter as input you need to add an additional step to “Get” the SmartObject Method and then assign a value to a parameter on that SmartObject Method.
Finally you execute the SmartObject.
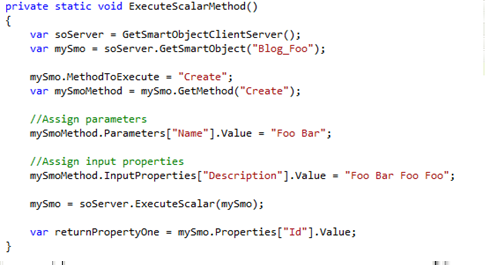
Scalar Method Execution
After executing your SmartObject method you can inspect the database to view the result.
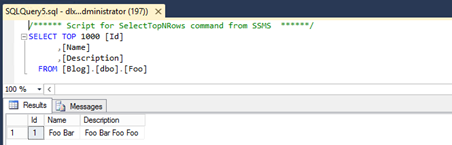
Database Result
It is important to note that the SmartObject and Method names are the names stored by K2 which is usually not identical to the names you created them with. For example, if you create a SmartObject called “My.SmartObject”, K2 will likely save it as “My_SmartObject”. The same applies to method names.
The K2 SmartObject tester can be used to inspect the exact names K2 assigned to SmartObjects and Methods. An easy way to inspect is to generate a C# class for the SmartObject – this opens a C# class will all methods, properties and the SmartObject defined as it is saved by K2.