The UiPath Custom Activity in this demo will generate a report that is hosted in SSRS and save it with a specific name in a specific location. (The report will be saved in a PDF format). You should be able to create a Custom Activity for any other functionality that might be required where the current activities within UiPath does not meet your desired outcome.
Technologies that will be used to create the Custom Activity:
- Visual Studio 2017
- NuGet Package Explorer
Step 01
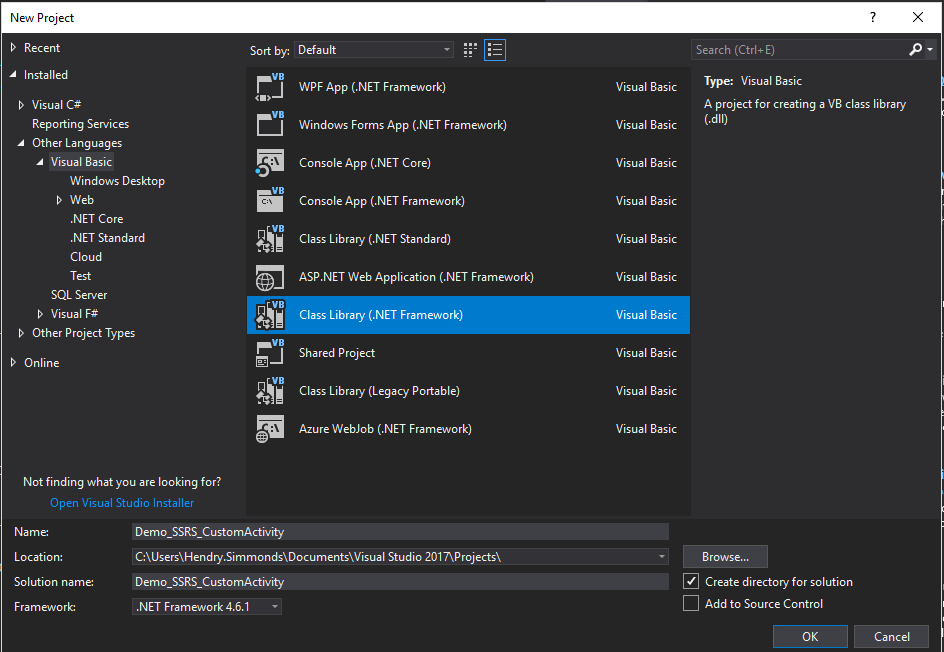
Open Visual Studio and create a new project.
Make sure to select ‘Class Library (.NET Framework)’
Give a descriptive name relevant to the project.
Step 02
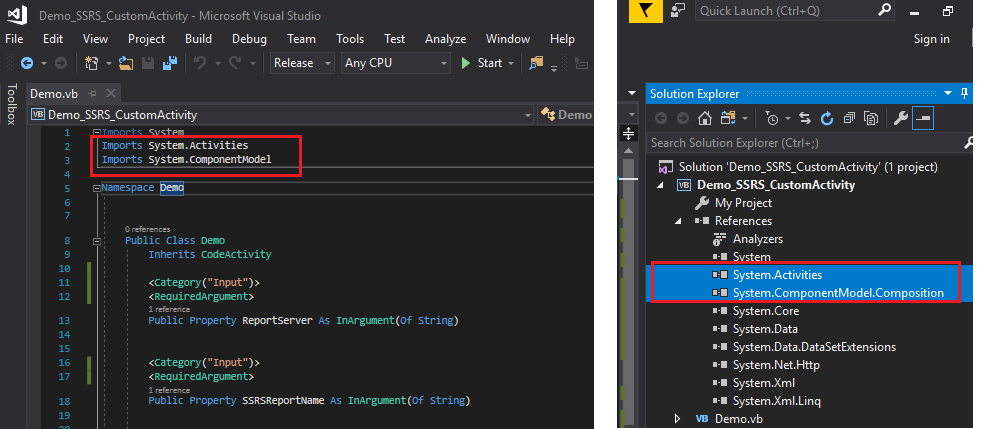
Once the newly created project opens up, add 2 references:
- System.Activities
- System.ComponentModel.Composition
Also make sure to use/import the relevant namespaces.
Step 03
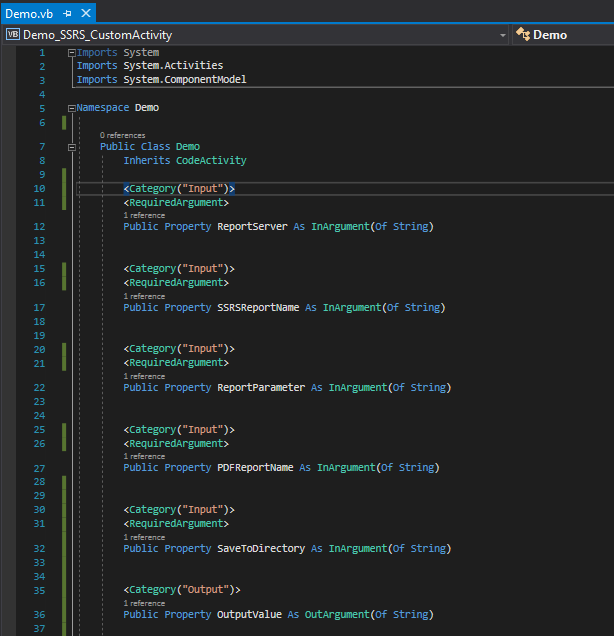
The main class will need to inherit the abstract class CodeActivty.
Then you will create the Input and Output arguments.
Input argument example:
Note: the <RequiredArgument> attribute will force the user to provide a value when this custom activity is used within UIPath.
<Category(“Input”)>
<RequiredArgument>
Public Property ReportServer As InArgument(Of String)
Output argument example:
<Category(“Output”)>
Public Property OutputValue As OutArgument(Of String)
See Step 8 on how these Input and Output arguments will be used within UIPath.
Step 04
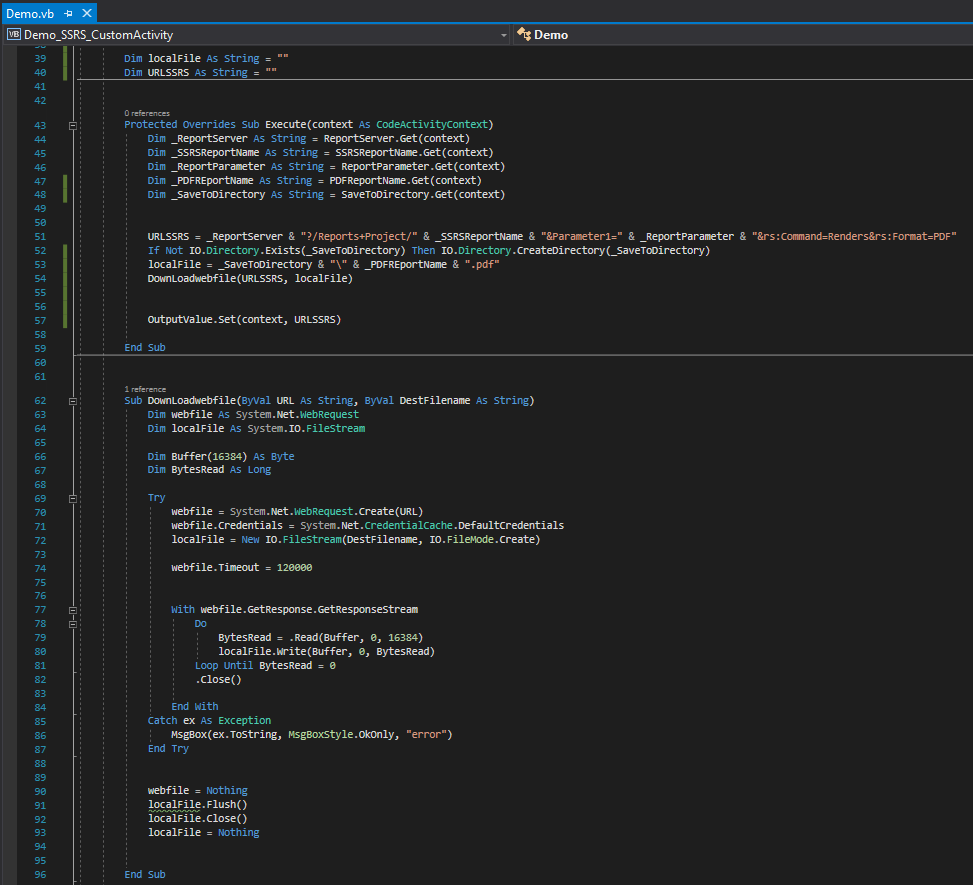
Within the Execute procedure:
The Input arguments are retrieved which will be provided by the user through UIPath.
These Input values are used to set the following variables:
- URLSSRS: This will be the URL that points to the relevant report within SSRS. It also states in which format the report should be saved as. (PDF in this example)
_ReportServer & “?/Reports+Project/” &
_SSRSReportName & “&Parameter1=” &
_ReportParameter & “&rs:Command=Renders&rs:Format=PDF”
In the URL string above:
_ReportServer will hold the report server name.
_SSRSReportName will hold the report name within SSRS.
_ReportParameter will hold the parameter value that needs to be passed to the report.
- localFile: This will be the Directory path where the report will be saved to with the specific name provided.
_SaveToDirectory & “” & _PDFREportName & “.pdf”
In the string above:
_SaveToDirectory will hold the directory path where the report will be saved to.
_PDFReportName will hold the name of what the report should be called.
These 2 variables are then passed to the custom DownLoadwebfile Procedure that will generate the report.
In this example there is also an Output argument called OutputValue.
Not that any output is really required in this method, it has just been added to show the functionality of the Output argument.
In this example it will just pass the URLSSRS variable value to the OutputValue argument that will be displayed when the UIPath process is executed later. (See Step 8)
Step 05
Once all the previous steps have been completed.
Build the visual studio solution within Release.
You should find the DLL created within the project’s Release folder:
Step 06
Open NuGet Package Explorer.
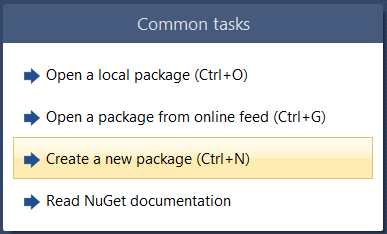
Select ‘Create a new package’.
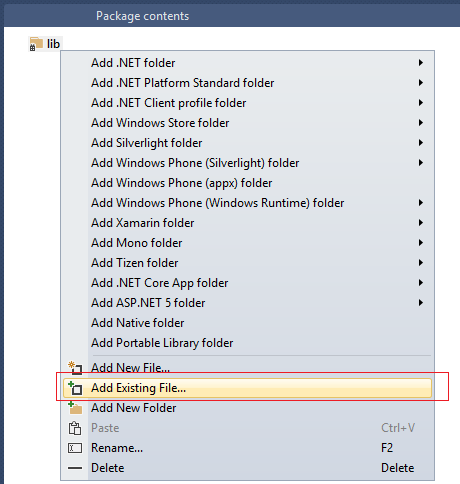
Under the Package Contents window, right click and select ‘Add Lib Folder’.
Right click the ‘lib’ folder that appears under the Package Contents window and select ‘Add Existing File…’.
Navigate to the DLL file that was created under the Release folder. (Same path as when Visual Studio solution was built in Step 5)
Select dll file and click on Open button.
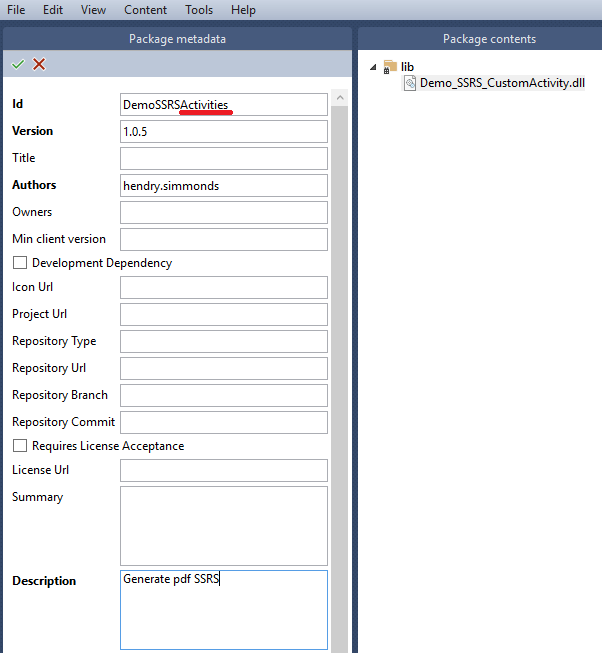
Under the Package Metadata window, select ‘Edit Metadata’.
Provide an Id name, Version and Description.
Note: The Id should contain the word Activities. This will let it appear within UIPath Package Manager.
Once done, click on the green button.
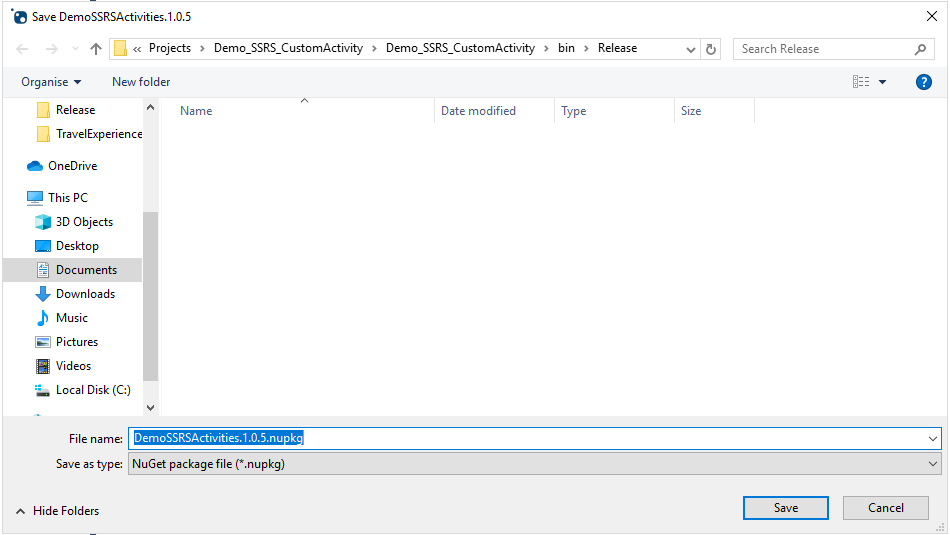
Select ‘File’ from the menu and select ‘Save As…’.
Select the path where you would like to save the package too. In this example it is saved to the same Release folder where the dll file exists.
After saving the package, you can close the NuGet Package Explorer.
Step 07
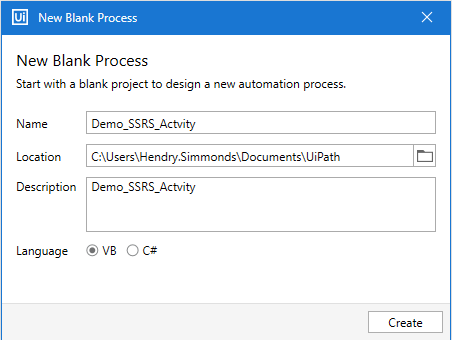
Open UIpath Studio and Create a new process.
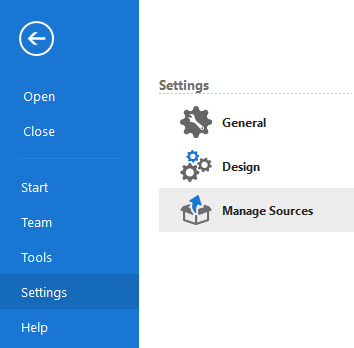
Once process is created, navigate to Start – Settings – Manage Sources.
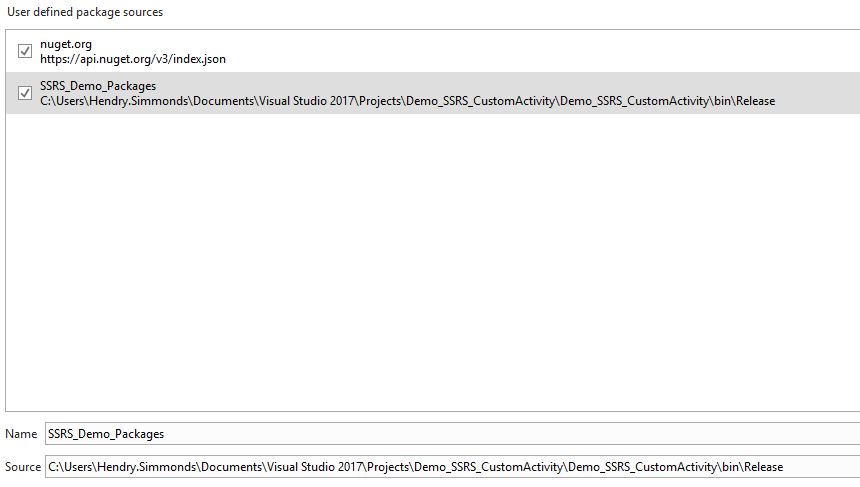
Under the ‘User defined package sources’ window, add a new package source.
Name: Provide any name
Source: Point to the path where the NuGet package was saved to.
Step 08
Once the new package source has been created, navigate back to the process Design window.
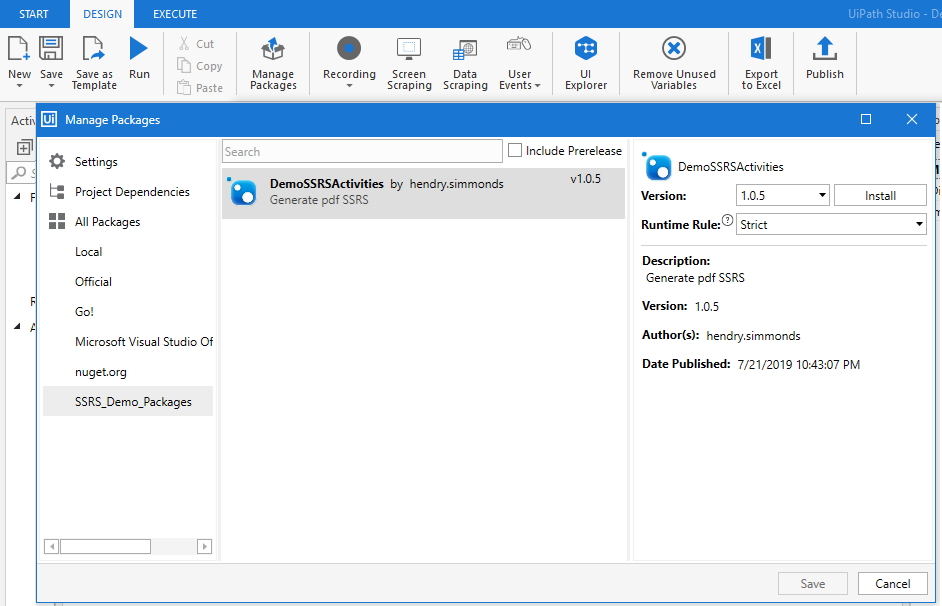
Select the Manage Packages option from the ribbon menu.
Within the Manage Packages window the package should be available.
In this example it is called ‘SSRS_Demo_Package’.
When you click on the package name you should see the NuGet package.
In this example it is called ‘DemoSSRSActivities’
Select this package. Click on Install and then on Save.
The custom activity should be available under the Activities window.
Step 09
Drag the Custom Activity onto the Design canvas.
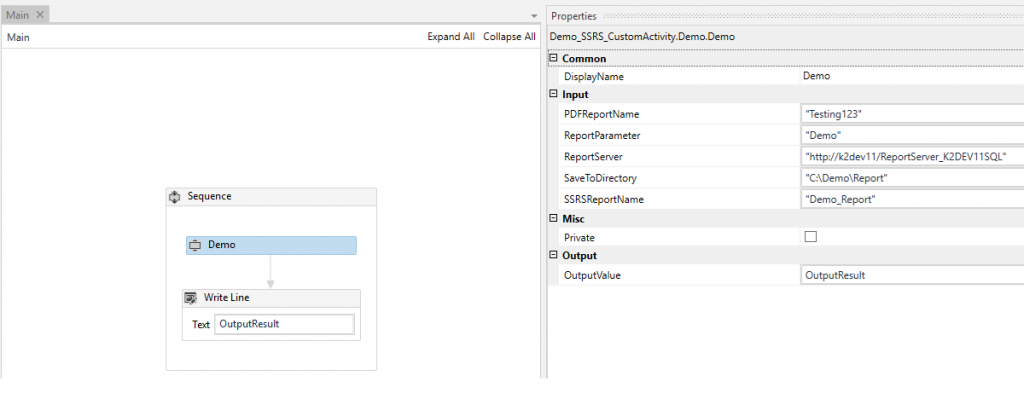
When you select the Custom Activity on the Design canvas, you should see the following Input and Output properties. (These are the arguments that was created within the Visual Studio project (See Step 4))
Input:
- PDFReportName
- ReportParameter
- ReportServer
- SaveToDirectory
- SSRSReportName
Output
- OutputValue
An ‘OutputResult’ variable has been created to hold the OutputValue returned from the custom activity. This has been added within a ‘Write Line’ activity that will display the SSRS URL used within the custom activity.
This SSRS URL points to the ‘Demo_Report’ hosted in the SSRS.
Step 10
Once all the input arguments have been entered correctly, run the UIPath process.
When the process has completed, navigate to the directory path you entered against the ‘SaveToDirectory’ argument.
The PDF report, with the supplied name provided within the ‘PDFReportName’ argument should be available in the directory.
Thanks for taking the time to read this blog, we hope you found it useful. If you need further technical advice or support on UiPath or other low-code development platforms, get in-touch with one of our experts today.


