


In one of my previous blogs we discussed the creation of “Preceding Rules”. These were rules that would be evaluated before a K2 Workflow Activity should execute. Today we’ll be looking at “Succeeding Rules”. These are rules that will be evaluated after a K2 Workflow Activity has been executed and will determine whether or not the K2 Workflow Activity may finish.
First we’ll need a Workflow Activity. A Workflow Activity is a container for K2 Workflow components. Drag-and-Drop an event from the toolbox onto the K2 Workflow Designer, the event will automatically be placed inside a Workflow Activity.
K2 Automated Testing Software
BenchQA allows full test automation of K2, including fully automated K2 SmartForms and K2 Workflow testing. It promotes test driven development for K2 and ensures continued quality assurance for K2 solutions. Easily apply changes to test cases to accommodate changes to K2 apps and ensure all apps are regression tested to avoid defects and assure continuous quality.

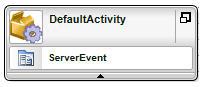
Figure 1 – Default Workflow Activity
Now hover your mouse over the newly created Workflow Activity, and run the default wizard by clicking on the down arrow that appears on the right hand side.
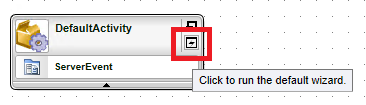
Figure 2 – Opening the Default Wizard
The “Activity General Properties” dialog will appear and display the default tab “General Properties”.
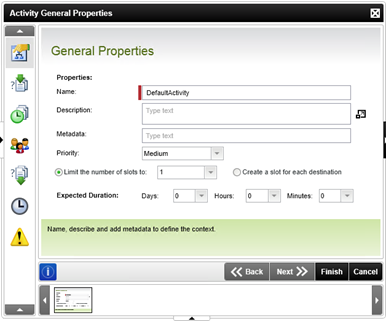
Figure 3 – Activity General Properties
On the left side of the dialog, you’ll notice seven icons, each representing a separate Tab. Click on the fifth tab to view the “Succeeding Rules” screen.

Figure 4 – Preceding Rule
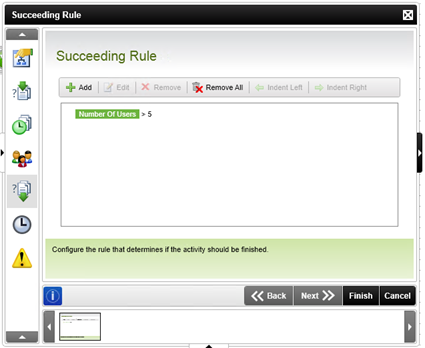
This view will display a list of all succeeding rules created on the activity. At this point, the list is empty. Click on the “Add” button on the tool bar to add a new Succeeding rule.

Figure 5 – Adding a new Succeeding Rule
A Succeeding rule is executed by evaluating two variables against a comparison operator. Enter the first variable by either typing in a value or selecting one from the Context Browser. The Context Browser can be opened by clicking on the “Browse” button to the right of the First Variable field.

Figure 6 – First Variable
Now select a Comparison Operator. This is the field that will be used to compare the first and second variable.

Figure 7 – Comparison Operator
Now enter the second variable the same way as you entered the first. Either type in a value or select one from the Context Browser.

Figure 8 – Second Variable
Now click on the “OK” button. Notice that the new Succeeding Rule has been added to the Preceding Rules list.
Multiple succeeding rules can be added to the same Workflow Activity when necessary. You can also use the “Edit” button to make any changes to a Succeeding rule or use the “Remove” button to delete a rule when it is no longer necessary.
For more information, click here…