


K2 WorkFlow Escalation
Users of the K2 Workflow are often required to interact with the workflow at certain points. When one of these points is reached the Workflow will often wait for the user to interact with the workflow before being able to continue through the process. An important feature provided by the K2 Workflow is the ability to escalate workflow items when they have not been actioned within a specified amount of time. In this blog I’ll show you how to configure escalations on a Workflow Activity
First we’ll need to create a Workflow Activity. A Workflow Activity is a container for K2 Workflow components. Drag-and-Drop an event from the toolbox onto the K2 Workflow Designer, the event will automatically be placed inside a Workflow Activity.
K2 Automated Testing Software
BenchQA allows full test automation of K2, including fully automated K2 SmartForms and K2 Workflow testing. It promotes test driven development for K2 and ensures continued quality assurance for K2 solutions. Easily apply changes to test cases to accommodate changes to K2 apps and ensure all apps are regression tested to avoid defects and assure continuous quality.

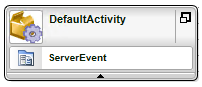
Figure 1 – Default Workflow Activity
Now hover your mouse over the newly created Workflow Activity, and run the default wizard by clicking on the down arrow that appears on the right hand side.
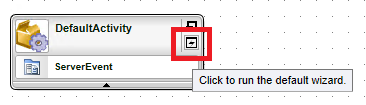
Figure 2 – Opening the Default Wizard
The “Activity General Properties” dialog will appear and display the default tab “General Properties”.
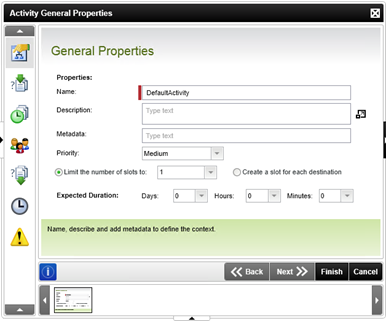
Figure 3 – Activity General Properties
On the left side of the dialog, you’ll notice seven icons, each representing a separate Tab. Click on the fifth tab to view the “Escalations” screen.
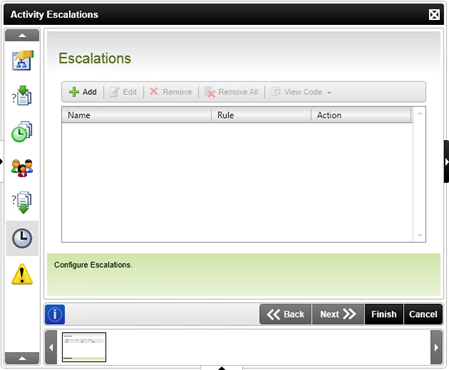
Figure 4 – Escalations screen
To add a new Escalation click on the “Add” button to open the “Add Escalation” screen.
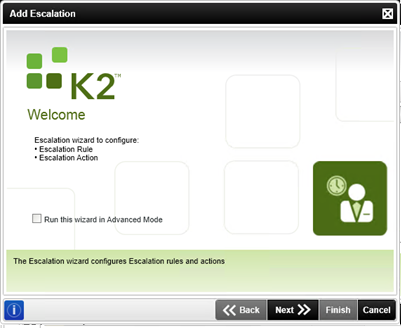
Figure 5 – New Escalation
Once the “Add Escalation” screen has been opened, click on the “next” button to move to the “General Properties” screen. Enter a name for the escalation you are creating in the “Name” field and a description in the “Description” field.
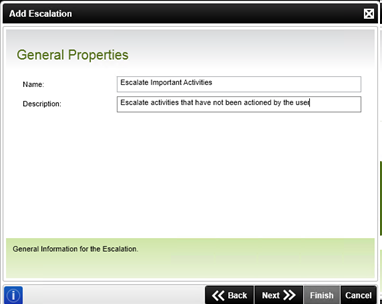
Figure 6 – General Properties screen
Click on the “next” button to view the “Rule Template” screen. When we escalate a workflow activity we can do it in two ways. Firstly we can escalate the activity when it reaches a certain age. Select the “Escalate After” template to enter the amount of time to wait before escalating the activity. The Second way is to escalate the activity on a specific date and time. Select the “Escalate On” template to set the specific date on which to escalate the activity. In this blog I have opted for the “Escalate After” template.

Figure 7 – Rule Template screen
Click on the “Next” button, to view enter the date and time settings for the template you have selected.
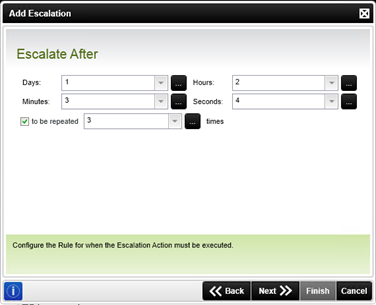
Figure 8 – Escalate After
Use the drop down fields to select the number of days, hours, minutes and seconds to wait before escalating an activity. Notice that next to each field you can use the browse context button to open the Context Browser in order to select a value from a smart object, data field or expression. It is also possible to repeat the escalation multiple times. Simply check the “to be repeated” checkbox and enter the amount of times to repeat the escalation. Click on the “next” button to view the “Working Hours screen”

Figure 9 – Working Hours screen
When we opt to escalate an activity after a certain amount of time, it effectively creates a timer that will run out and then trigger an escalation. On the “Working hours” screen we need to let K2 know whether it should take all 24 hours of the day into consideration, or only Work Hours. At this point you can choose the “none” option if you’d rather ignore the Working hours. Click on the “next” button to move onto the “Action Template” screen.
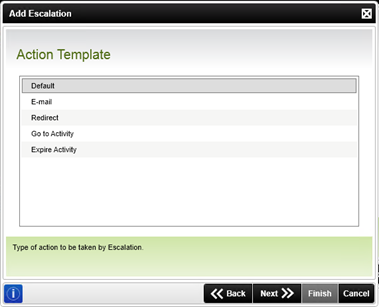
Figure 10 – Action Template
On the “Action Template” screen, we can choose the action K2 should take when an escalation has occurred. K2 can send an e-mail, redirect the workflow or simply allow the activity to expire, amongst other things. Selecting the “Default” action, will cause the escalation to simply choose the default action setup for that activity. Click on the “next” button to finalize the escalation.
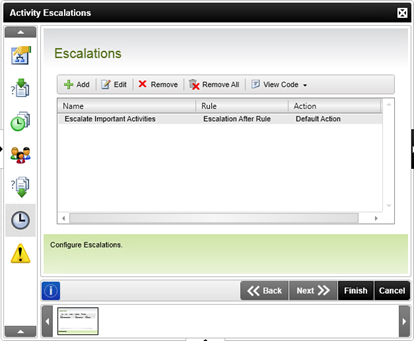
Figure 11 – New Escalation
Multiple escalations can be setup at the same time to perform different actions at different times. Escalations are useful to ensure that the workflow gets dealt with in a timely fashion.
More about K2 Solutions and Velocity IT