


K2 Package and Deployment
Deploying your K2 application is wrapped in a wizard type process but still gives you control to modify and change what and how certain objects within your application is deployed..
K2 Automated Testing Software
rnBenchQA allows full test automation of K2, including fully automated K2 SmartForms and K2 Workflow testing. It promotes test driven development for K2 and ensures continued quality assurance for K2 solutions. Easily apply changes to test cases to accommodate changes to K2 apps and ensure all apps are regression tested to avoid defects and assure continuous quality.

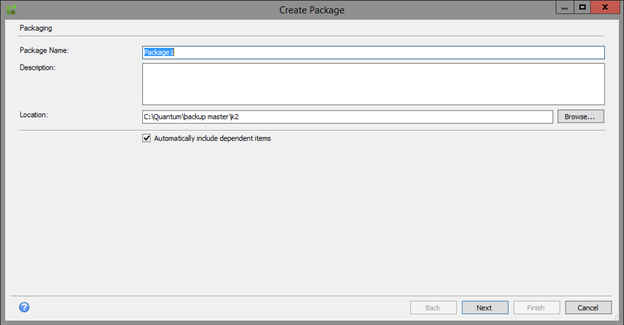
 K2 Package & Deploy – Create New Package – 1
The first step in a K2 deployment is creating a new deployment package. These packages can also be created and stored for backup purposes during the development stage.
 K2 Package & Deploy – Create New Package – 2
It is advisable to check the “Automatically include dependent items” checkbox unless you know the exact objects and their dependencies that need to be packaged.
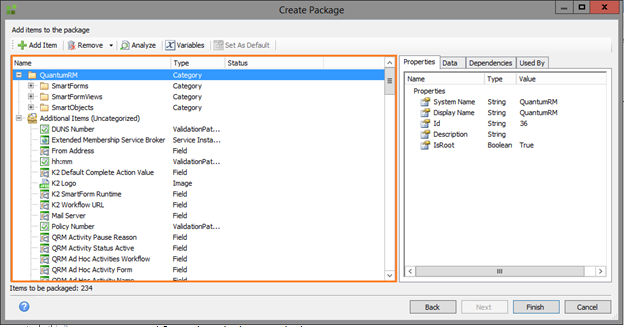
Once you have specified a name and location for your deployment package you click next and on the next screen select “Add Item”. This will then populate the left hand panel with a selection of objects in your development environment.
 K2 Package & Deploy – Add Items – 3
The items are split into different categories (depending on your environment folder structure and setup), it is best practice to always save different projects with a folder structure demonstrated below.
 K2 Package & Deploy – Add Items – 4
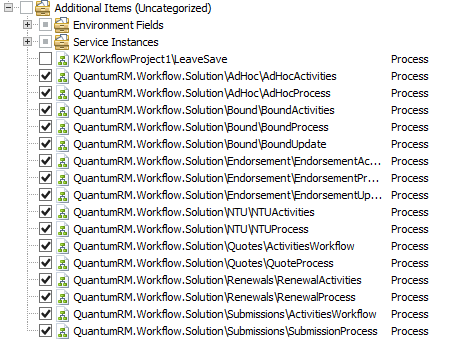
Your K2 Workflow items, miscellaneous fields (environment fields) as well as service instances are grouped under the “Additional Items (Uncategorised)” folder.
 K2 Package & Deploy – Add Items – 5
After you have selected all the items you want to include in your build, the K2 package and control will validate all items and include dependencies. Once this validation process is finished you simply click finish and your “deploymentpackage.kspx” will be saved in your specified folder and ready to be used as a deployment package.
 K2 Package & Deploy – 6