


The K2 SmartForms Timer Control has but one function – to countdown a number of milliseconds and raise an event. This executes any K2 action including SmartForm and Workflow actions.
K2 Automated Testing Software
rnBenchQA allows full test automation of K2, including fully automated K2 SmartForms and K2 Workflow testing. It promotes test driven development for K2 and ensures continued quality assurance for K2 solutions. Easily apply changes to test cases to accommodate changes to K2 apps and ensure all apps are regression tested to avoid defects and assure continuous quality.

In this blog we will see how to configure and use the K2 Timer Controls as there are various applications for this. You might use a calendar control to surface new incidents to agents and need to automatically load these. This control works great in this case. You might also want to update KPIs on a K2 List View periodically without a manual browser refresh – this also works great for this scenario.
How to configure the Timer Control?
In this scenario we will create a simple K2 Item View and a K2 List View to create and display a user’s record respectively. We will use the timer control to automatically refresh the K2 SmartForm List View after a time interval. This is a simple example, but shows you exactly how to configure the Timer Control in K2.
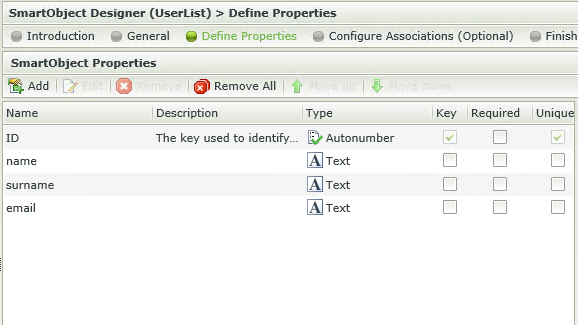
- First, create a SmartObject with a few properties –
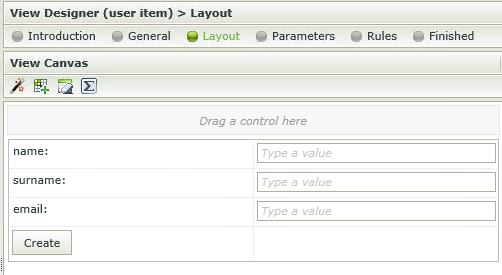
- Next, generate a K2 Item View from the K2 SmartObject. Ensure the “Create” method is included in the view generation.
- Next, generate a K2 List View from the K2 SmartObject.

- Add the views to a K2 Form.

- Next, add the K2 Timer Control to the form design canvas. The Timer Control can be found in the Action section of the Controls section as per the screenshot below.
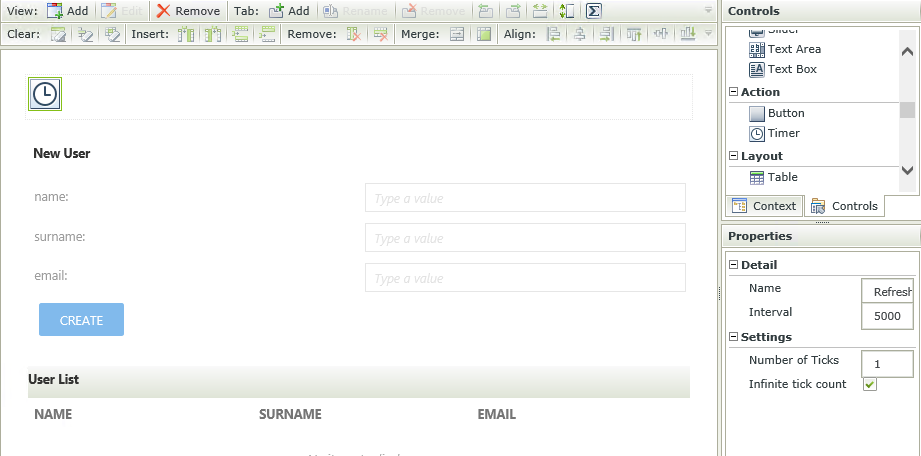
Set the properties to set on the Timer Control next.
- Next, we configure the rules of the Timer Control by navigating to the form’s Initialize rule and adding the “Execute a control’s method”. Select the “Start” method.
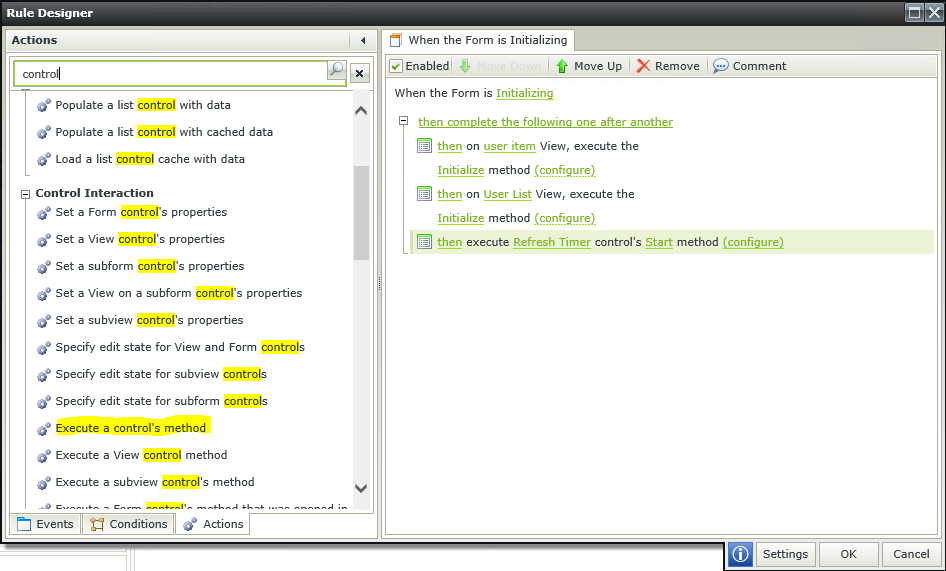
- You can change the Timer Control’s configuration by clicking on the (configure) link if you want to override the ones configured on the canvas’ properties window earlier.
- Next, add a new rule “When a control on the form raises an event”, select the Timer Control and select the “Is Ticked” method. For our scenario, I’ve added a “Get List” method on my list view.

- Click OK, save and check in the form.
Seeing the K2 Timer Control in action
What we expect to see is once we add a new record, the list view automatically refreshes every 5 seconds showing the updated list.
Applications of the K2 Timer Control in action
The example above is a simple explanation how to configure and use the K2 timer controls and there are various applications for this such as using a calendar control to surface new incidents to agents with the need to automatically load these. Or, for instance, you might want to update KPIs on a K2 List View periodically without a manual browser refresh.