


Building K2 SmartForms is usually very easy and straight forward. One of the simplest controls to use is the radio button. While the radio button works in the exact same way as the standard HTML radio button, grouping radio buttons together works slightly different. In this blog I will show you how to use multiple radio buttons, and then show you how to group radio buttons together.
First, I need to add radio buttons to a K2 SmartForm. This step is as simple as selecting the radio button control from the tool box and dragging it onto the K2 SmartForm.
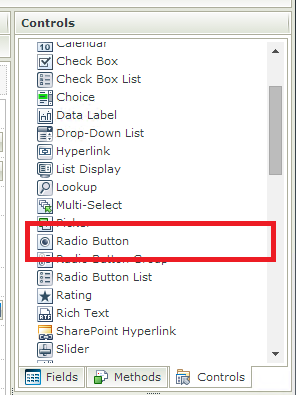
Figure 1 – The Radio button control
K2 Automated Testing Software
BenchQA allows full test automation of K2, including fully automated K2 SmartForms and K2 Workflow testing. It promotes test driven development for K2 and ensures continued quality assurance for K2 solutions. Easily apply changes to test cases to accommodate changes to K2 apps and ensure all apps are regression tested to avoid defects and assure continuous quality.

I’ve added some radio buttons onto a K2 SmartForm and placed a label identifying the radio buttons based on the way I will group them.
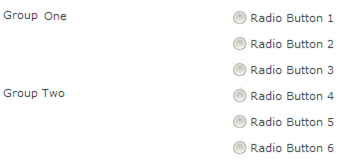
Figure 2 – Radio buttons added to the K2 SmartForm
Now, before grouping the radio buttons, they will behave in the following way: whenever a radio button is selected, a check will appear within the circle image of the radio button; this will indicate that the radio button has been selected. At the same time if any of the other radio buttons have been selected, they will automatically deselect at this point, to ensure that only one selection is made at any given time. The purpose of grouping radio buttons together is to allow us to make multiple selections, by making one selection per group.
Now I will show you how to make these groupings, by adding the Radio button group control onto the K2 SmartForm.
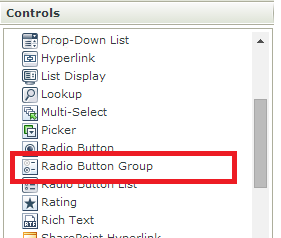
Figure 3 – The Radio button Group control
This step is just as simple as adding the original radio buttons. Simply drag and drop the Radio button Group control anywhere onto the K2 Smart Form. Bear in mind that when the K2 SmartForm is viewed, the Radio button Group control will automatically be hidden from view, so you have no need to worry about where on the SmartForm you place the Radio button Group Control.
I will add a Radio button Group Control for each of the Groups I’d like to create. In this example, I will add two groups.
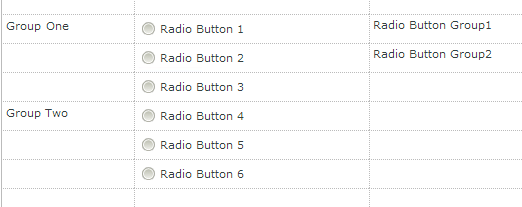
Figure 4 – Adding the Radio Button Group Control to the K2 SmartForm
The next step involves giving each Group an appropriate name. The name of the group will identify the group and make it easy to understand what the group is for. Simply select the group you wish to name and set the “Name” property in the properties window.
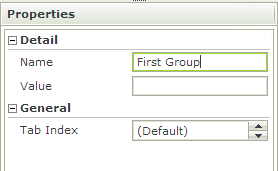
Figure 5 – Setting the Name property of the Radio Button Group
I have now named my 2 groups, “First Group” and “Second Group”. In the next step I will assign each radio button to one of the groups that I have created. In order to do this, select the radio button you wish to group, and change the “Group” property in the properties window. Notice how the names of the two groups I created appear in the list of available groups.
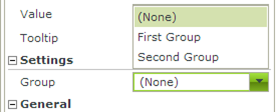
Figure 6 – Setting the Group property of the Radio Button
I have set the “Group” property of the first three radio buttons to “First Group” and the “Group” property of the second three radio buttons to “Second Group”.
Now that the radio buttons have been grouped, you will notice that you are able to make one selection per group.
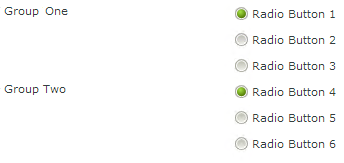
Figure 7 – The New behaviour of the Radio Button after grouping
Having the ability to Group radio buttons can be extremely useful. Sometimes input is presented to the User in the form of multiple choice questions. Normally the user will only be able to make one selection across all the inputs, but now that I’ve shown you how to place radio buttons in groups, the User can make multiple selections where necessary.
About SmartForms
K2 SmartForms is a K2 blackpearl technology that allows the rapid creation and deployment of online forms, e-forms and workflow-driven forms applications.
About Velocity IT
Velocity IT has 15 years’ K2 experience and is one of the leading experienced K2 partners in the UK and Europe. We understand K2. Correct application of the product is key to ensure successful exploitation of its features. This is where we help our customers ensure return of investment on their K2 software.