How often do you view a list of data and find that the column headers disappear as you scroll? This is often due to the list not having its column headers fixed and can be frustrating as you need to keep scrolling back to the top locate your position. Look no further, this how to guide provides a step-by-step solution on how to implement the scrolling functionality on a List View once it reaches a particular number of records in the list.
K2 Automated Testing Software
rnBenchQA allows full test automation of K2, including fully automated K2 SmartForms and K2 Workflow testing. It promotes test driven development for K2 and ensures continued quality assurance for K2 solutions. Easily apply changes to test cases to accommodate changes to K2 apps and ensure all apps are regression tested to avoid defects and assure continuous quality.
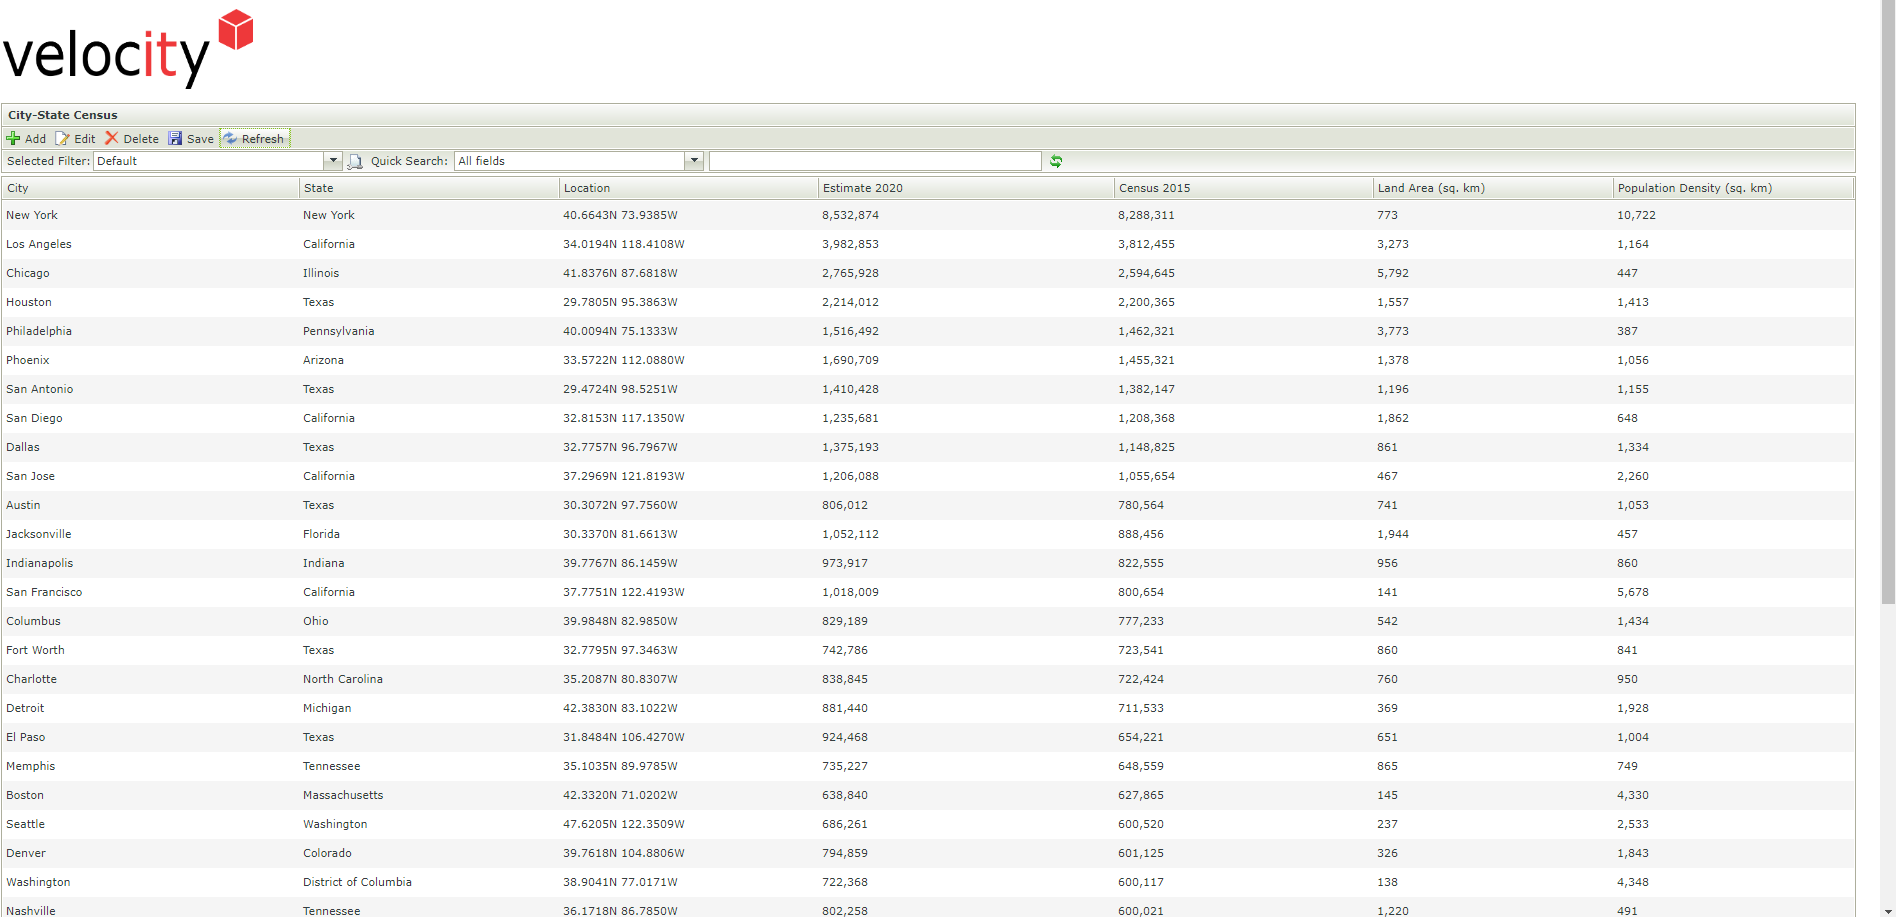
Example of current List View
Step 01
In Edit mode of the List View that will contain the data, navigate to the Layout pane. Add a Data Label onto List View and set the Properties of the Data Label as follows:
- Name: Unique and Descriptive. ex. ‘Data Label List Count’
- Enabled: Checked
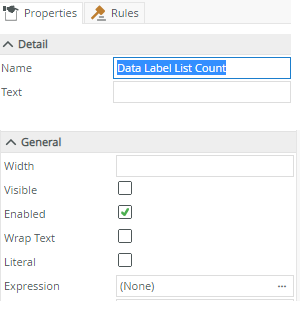
Data Label Properties
Step 02
Remaining in the Properties pane of the Data Label ‘Data Label List Count’, select the ellipsis button for the Expression property and add a new expression.
Give a unique/descriptive name for the expression (eg. ‘ListCount’) and Add a List Count Aggregation function to the Expression Details.
This will be used to count the number of records in the Smart Object that is used within the List View.
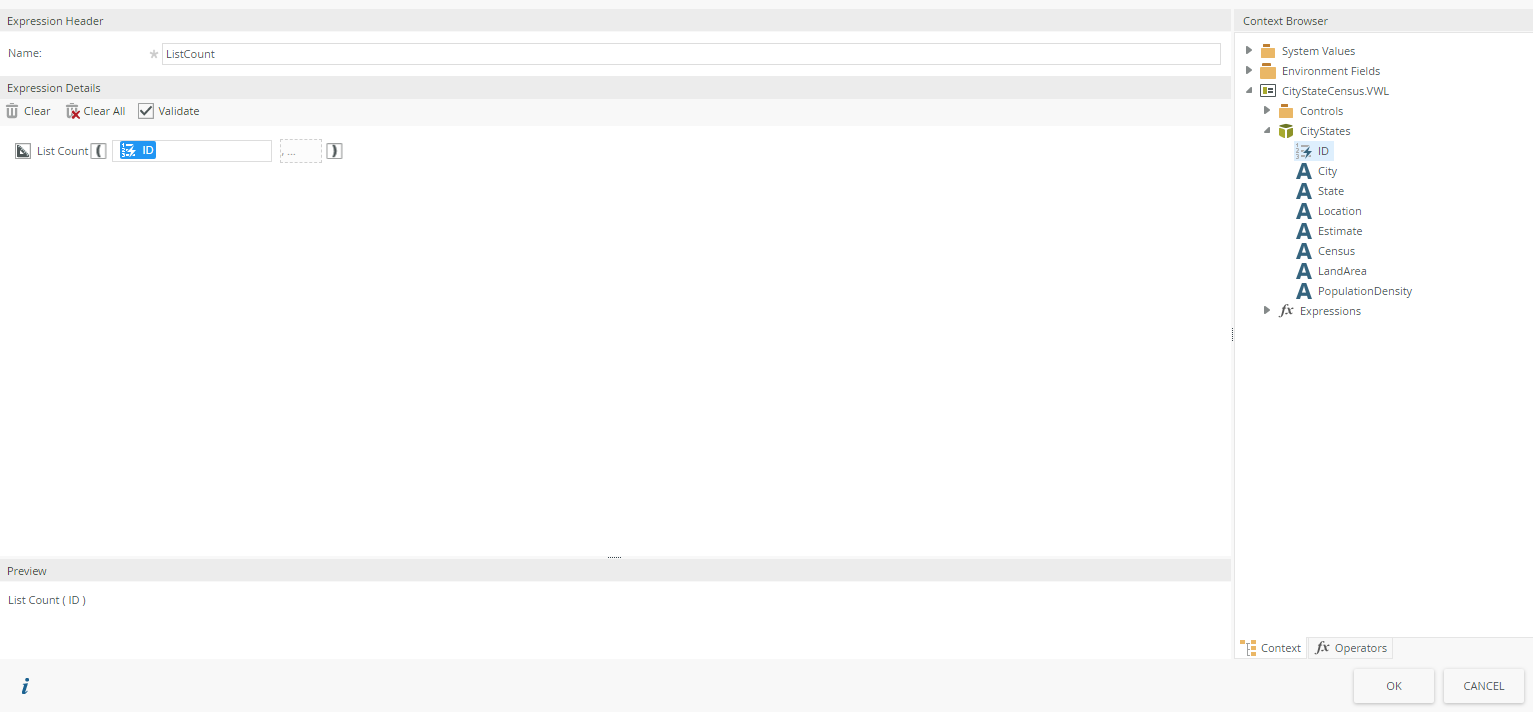
List Count Expression
For now, don’t assign this expression to the Expression Property for the Data Label ‘Data Label List Count’. We will assign this expression to the Data Label through the Rules pane of the List View.
Step 03
Navigate to the Rule pane of the List View and select the Add Rule option.
Give a unique/descriptive name to the Rule by selecting the Settings button and entering a value in the Name field. (ex. ‘GetListCount’)
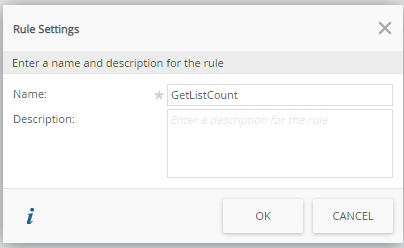
Rule Settings – Name
Add 2 Transfer Data actions to the Rule:
- On the 1st Transfer Data action, in the configure settings, check the checkbox next to the data label ‘Data Label List Count’. This will clear any value that exists against the data label.
- On the 2nd Transfer Data action, in the configure settings, drag and drop the ‘ListCount’ Expression against the data label ‘Data Label List Count’. This will populate the data label with the new list count value
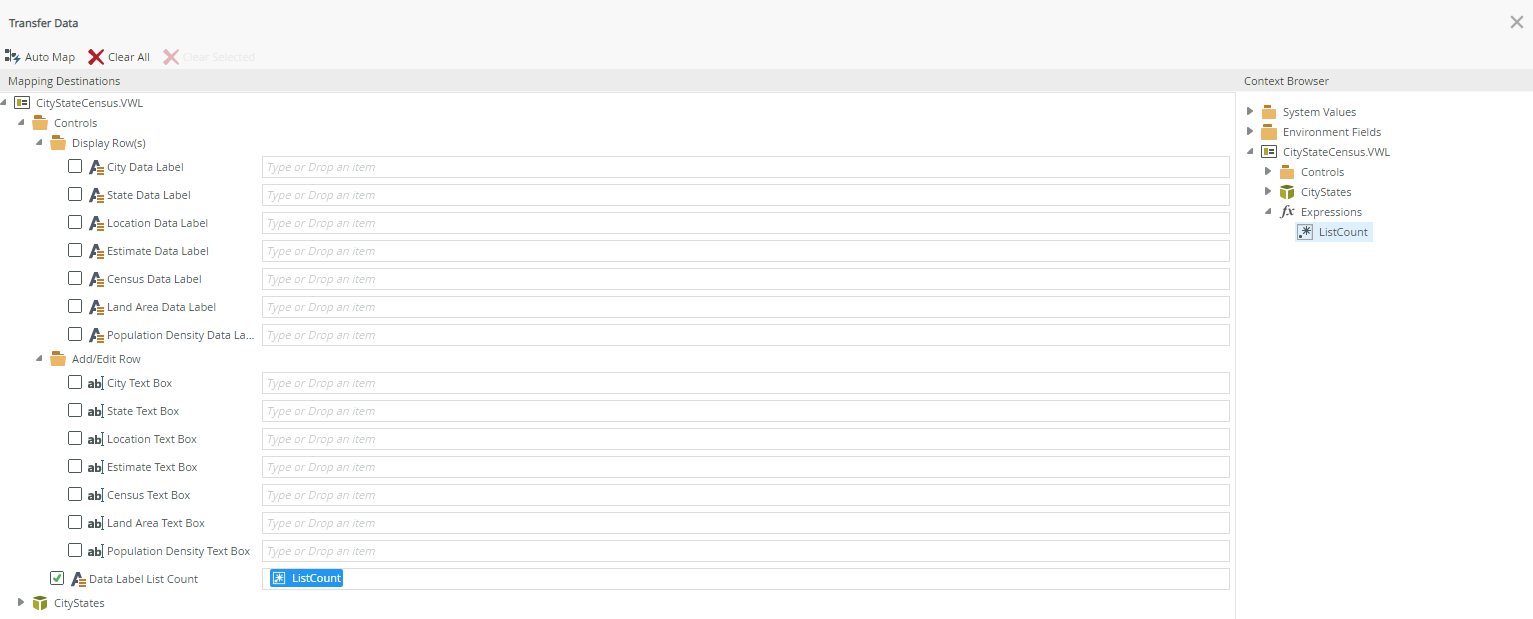
Assign Expression to Data Label
Step 04
Call the new created rule ‘GetListCount’ in all the other Events/Rules that will have an effect on the number of records in the List View.
For example:
- ‘When the View executed Initialize’ rule
- ‘When Save Toolbar Button is Clicked’ rule
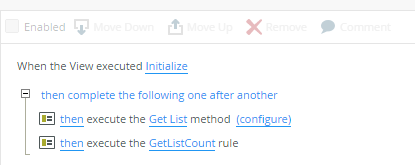
Call/execute new created rule
Step 05
After saving the changes to the List View, navigate to the Form that contains the List View.
On the Layout pane of the Form: Select the List View and, in the Properties pane, give a unique/descriptive name for the List View. (ex. ‘CityStateView’)
This List View name will be referenced in the JQuery we will setup in the next steps.

Set List View Name on Form
Step 06
On the Form Layout pane, add a Data Label onto Form and set the Properties of the Data Label:
- Name: Unique and Descriptive. ex. ‘Data Label List View Scroll’
- Enabled: Checked
- Literal: Checked (Important: JQuery won’t work if Literal property is not checked)
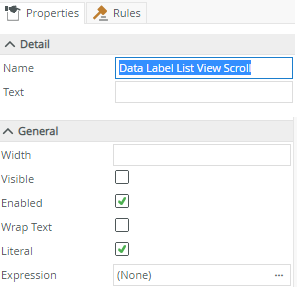
Data Label Properties
Step 07
Still on the Properties pane of the Data Label ‘Data Label List View Scroll’ created, select the ellipsis button for the Expression property.
Here we will add 2 Expressions which should have a unique/descriptive name for each expression.
Note: The List View name provided on the Form (In Step 5) is being referenced in the JQuery logic.
1. Expression Name: ‘ListViewScrollDefault’
This expression will hold the JQuery logic to show the List View without the scroll functionality.
<script>
setTimeout(function()
{
$(‘[name=”CityStateView”]’).find(“.scroll-wrapper”).css({ ‘height’: ‘100%’, ‘width’: ‘100%’, ‘overflow’: ‘auto’});
}, 250);
</script>
1. Expression Name: ‘ListViewScroll’
This expression will hold the JQuery logic to show the List View with the scroll functionality.
<script>
setTimeout(function()
{
$(‘[name=”CityStateView”]’).find(“.scroll-wrapper”).css({ ‘height’: ‘450px’, ‘width’: ‘100%’, ‘overflow’: ‘auto’, ‘padding-right’: ‘0px’});
var TheViewWidth = $(‘[name=”CityStateView”]’).width();
$(‘[name=”CityStateView”]’).find(“.grid-column-header-table”).css({ ‘left’: ‘0px’, ‘width’: TheViewWidth – 20+’px’});
}, 250);
</script>

Expressions for scroll functionality
Don’t’ assign any of these expressions to the Expression Property for the Data Label ‘Data Label List View Scroll’ created on the Form. We will assign this expression to the Data Label through the Rules pane of the Form when a certain condition is met.
Step 08
Navigate to the Rule pane of the Form and select the Add Rule option.
Add an Event to the rule called: ‘When a control on a View raises an event’
· Setup this event to reference the data label ‘Data Label List Count’ control on the List View when it gets Changed.
Add an Advanced condition to the rule:
· Setup a condition to check if the value for the ‘ListCount’ expression on the List View is Greater Than 15.
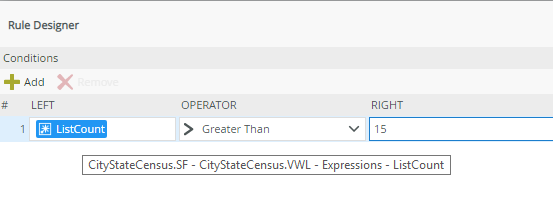
Advanced Condition
Depending on the result of the condition there are 2 paths to follow.
1. If value > 15
Add 2 Transfer Data actions:
- On the 1st Transfer Data action, in the configure settings, check the checkbox next to the data label ‘Data Label List View Scroll’. This will clear any value that exists against the data label.
- On the 2nd Transfer Data action, in the configure settings, drag and drop the ‘ListViewScroll’ Expression against the data label ‘Data Label List View Scroll’. This will populate the data label with the JQuery logic that will have the scroll functionality against the List View.
2. Else (value <= 15)
Add 2 Transfer Data actions:
- On the 1st Transfer Data action, in the configure settings, check the checkbox next to the data label ‘Data Label List View Scroll’. This will clear any value that exists against the data label.
- On the 2nd Transfer Data action, in the configure settings, drag and drop the ‘ListViewScrollDefault’ Expression against the data label ‘Data Label List View Scroll’. This will populate the data label with the JQuery logic that will NOT have the scroll functionality against the List View.
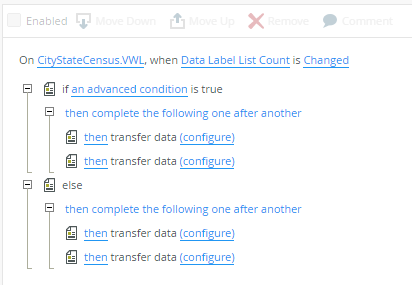
‘When a control on a View raises an event’ Rule
Step 09
After following all the steps mentioned, it is now time to view/test the changes.
Launch the application/form.
In this example, if the list count is greater than 15, the scroll functionality should be working on the selected List View.
You should notice that the column header stays in site when scrolling down the list of records within the List View.
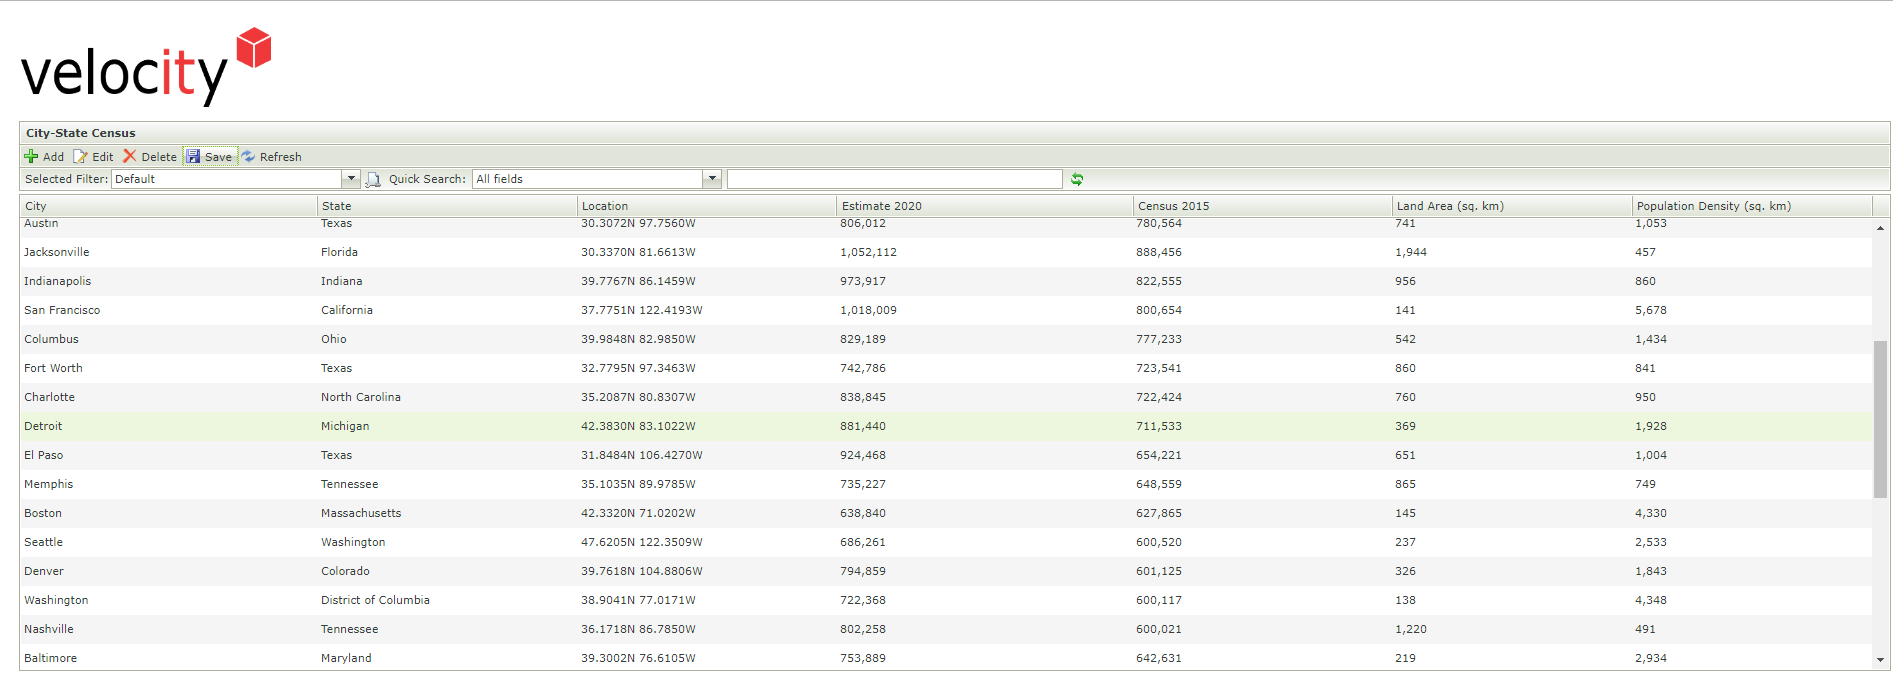
Example of modified list view
In Summary
- These steps can be used to implement the scrolling functionality on any List View displayed on the Form.
- If Out-of-the-box functionality doesn’t meet your requirement then JQuery becomes a very handy tool in the sense that it can be used to give you a bit more control over the look and feel of certain items.
If you found this K2 Resource useful, you may also be interested in reading our blog about how to Retain a K2 List View Page Number Using jQuery


