Exporting to Microsoft Excel is an important day-to-day requirement of many business users, however, in Mendix there is presently no out-of-the-box feature that allows you to directly export to an Excel file. This blog will describe the process of configuring a 3rd party control that will give the ability to export Mendix data directly to Excel.
To achieve this functionality, please follow the below 10 steps.
Step 01
Open Mendix Modeller and open the project that you’d like to add the excel export to.
Step 02
Open the App Store by clicking on the shopping trolley icon in the top right corner:

Step 03
Download Mx Model reflection:

Step 04
Download Microsoft Excel exporter:

Step 05
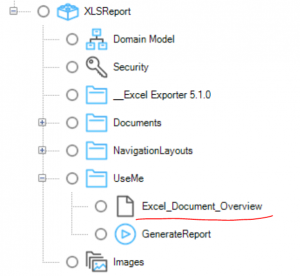
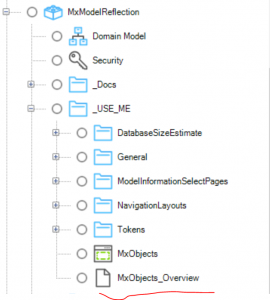
Create a new dashboard page and name the below two pages as follows: ‘Excel_Document_Overview’ & ‘Mx_Object_Overview’
Excel_Document_Overview
Mx_Object_Overview
Step 06
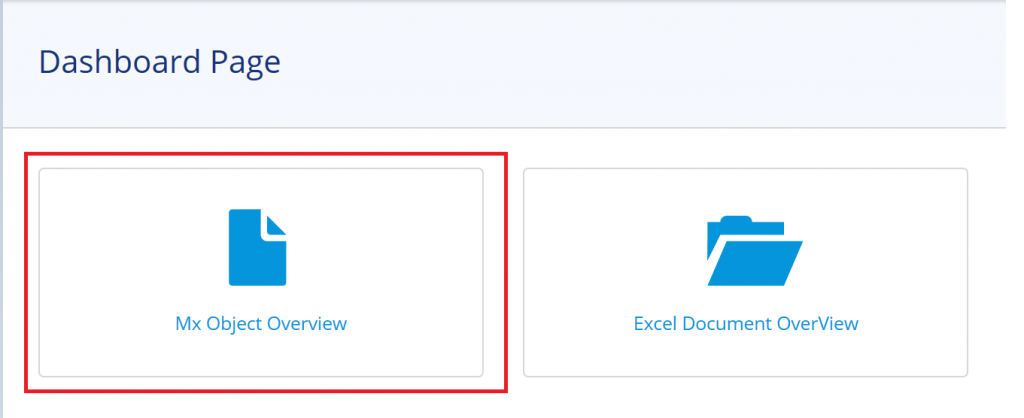
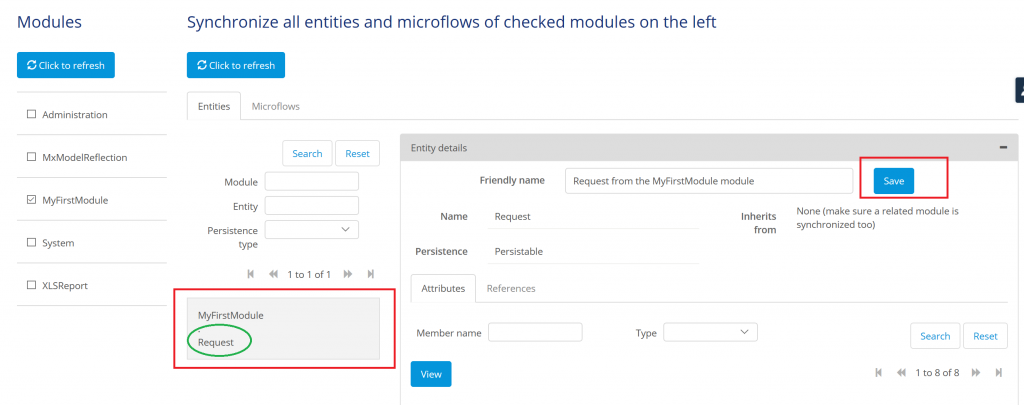
Access your dashboard and follow these steps to configure the Mx_object_overview:
- Click on ‘MxObjects_Overview_Page’ Navigation:
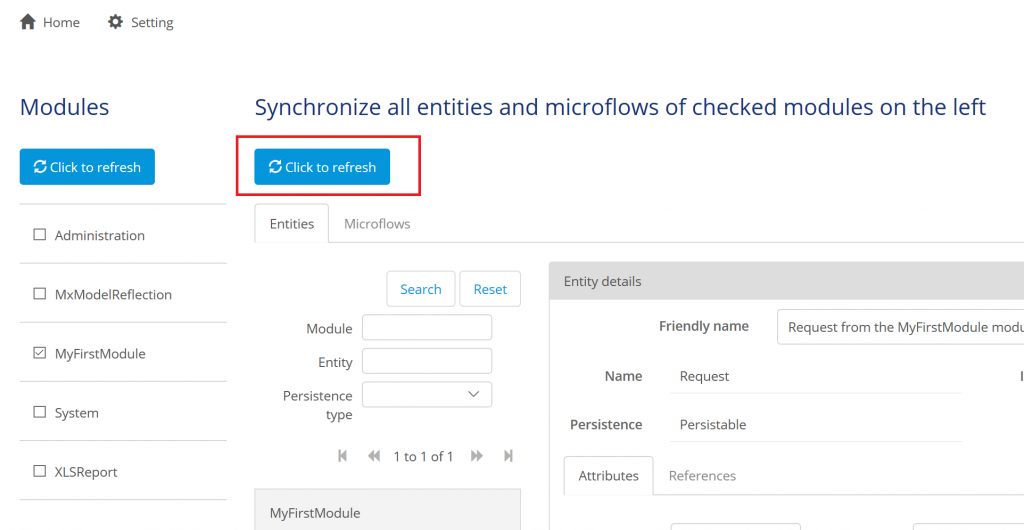
2. Select your Modules on Mx objects overview page:

3. Click ‘Click to refresh’ button below ‘Synchonize all entities and microflows of checked modules on the left’:
4. Select the entity from list of entity:
Step 07
Follow these steps to configure the Excel_Document_Overview
- Go to created dashboard Page . Click on ‘Excel_document_Overview’ Navigation.
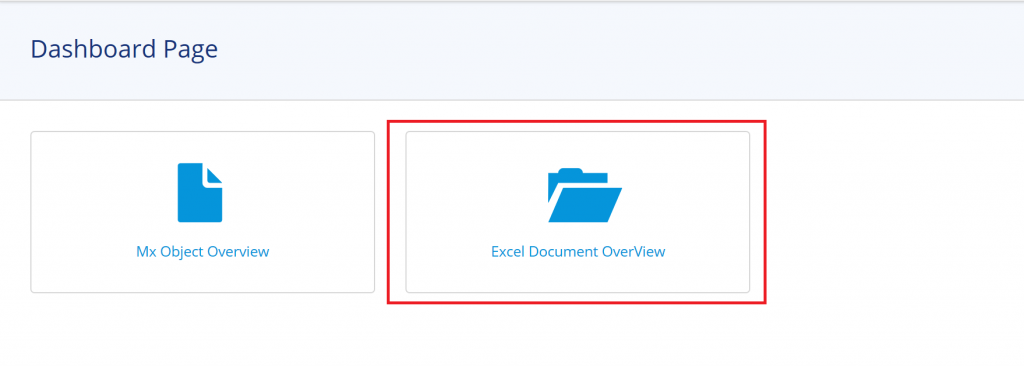
2. On Excel document overview page click ‘New’:

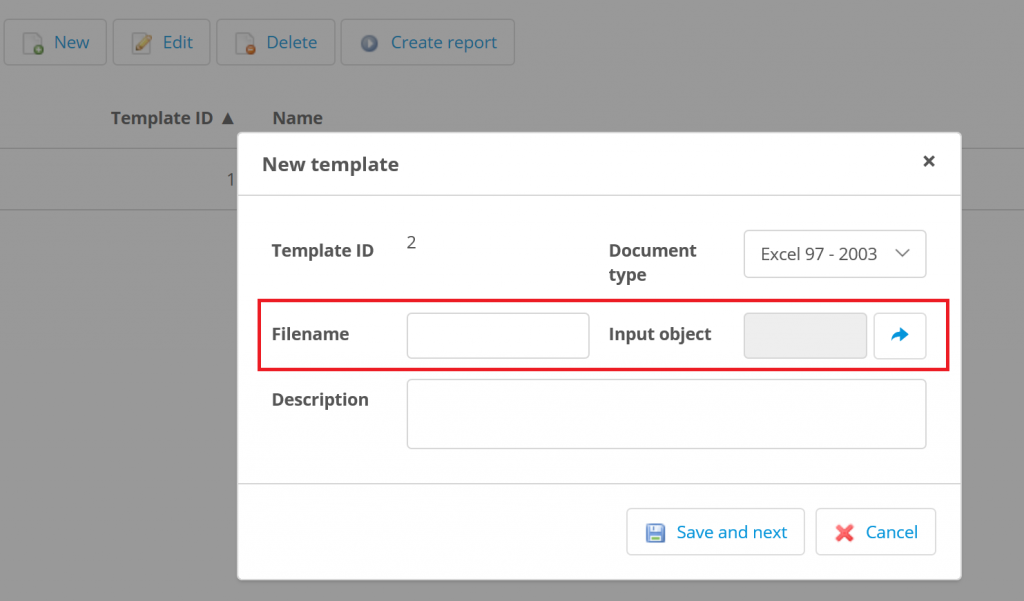
3. In pop up window ‘New Template’ Please enter File Name , select the Input object ( Entity Name) and click Save and Next.
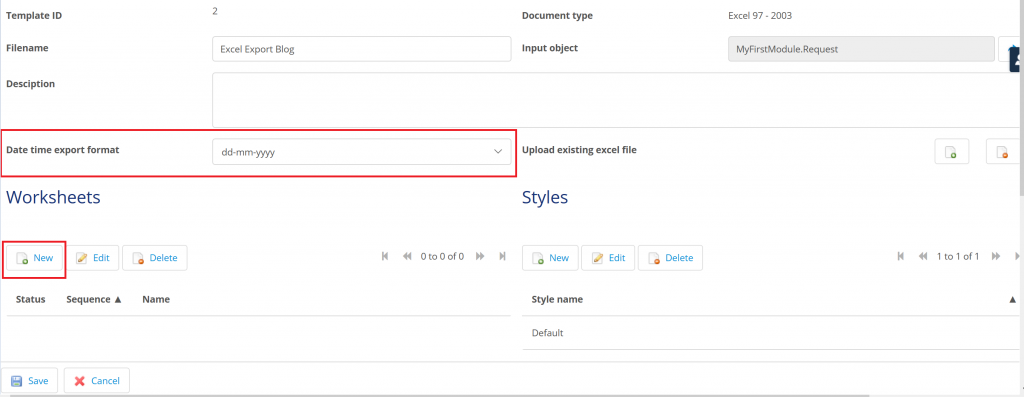
4. Select ‘date time export format’ in tempalte and create a new worksheet – click ‘New’ to create a worksheet:
5. Enter a worksheet ‘name’ and select ‘row object’ (entity name):
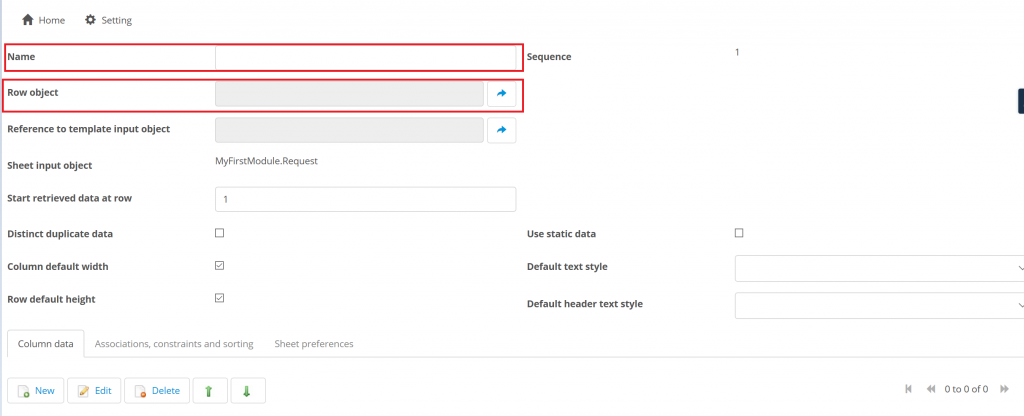
6. Add ‘Column data’ – Click on ‘New’ button in ‘Column data’ tab:

7. Add Column data by taking the following action:
- Column Number – Start from 0 to N
- Name – Enter name of column
- Retrieve type – set to Attribute
- Select attribute – select the correct attribute
- Save

8. Add vew column – Repeat step 7 to add another column manually.
9. End
Step 08
Select ‘Excel export’ to download the file:

Step 09
Call ‘Generate Report’ microflow from ‘XLS Report’ module:
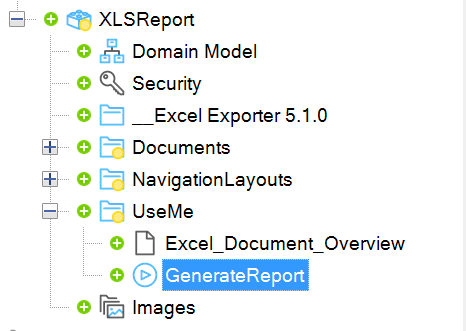
Step 10
Click on ‘Excel export’ to download the file:

- CONGRATULATIONS – YOU NOW KNOW HOW TO EXPORT EXCEL FROM WITHIN MENDIX
Synergy is brought to you by our Technical Experts at Velocity IT, it provides low-code developers a knowledge base of intelligent and creative solutions, built and implemented on real-time projects.


