


The K2 SmartForms List View is a control that is generally used to display lists of information in a grid format. The List View control contains rows and columns and allows the user to Add, Edit, Delete or Save information directly from the List View via the associated K2 SmartObject. One of the challenges using the K2 List View control is that the automatically generated columns often do not display very user friendly values. The control would for example display values such as True and False for Boolean columns instead of more business friendly values such as Yes and No. It is this drawback that I will be attempting to solve.
K2 Automated Testing Software
BenchQA allows full test automation of K2, including fully automated K2 SmartForms and K2 Workflow testing. It promotes test driven development for K2 and ensures continued quality assurance for K2 solutions. Easily apply changes to test cases to accommodate changes to K2 apps and ensure all apps are regression tested to avoid defects and assure continuous quality.

First I have created a simple [Users] table in the database. Note the fourth column [Authorised] has been set to use the [bit] Data Type. Using the K2 SmartObject Tester application, I have created a K2 SmartObject and published it to my project.
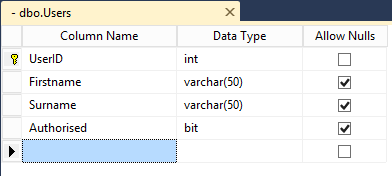
Friendly values in a K2 List View – Database Table
Next I have created a new K2 SmartForm View using the List View template. It is important at this point to set the Data Source property to the required K2 SmartObject, in this case, the Users SmartObject.
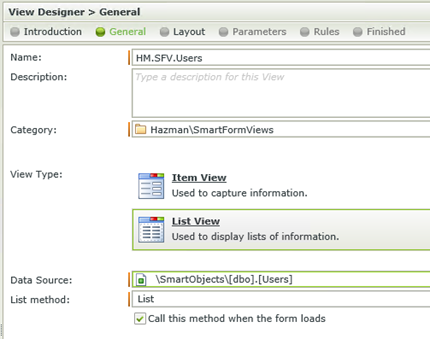
Figure 2 – K2 SmartForm View using the List View Template
K2 Smart Forms will use the K2 SmartObject and automatically generate the columns specified in the “Create Labels and Controls” dialog box. Note once again the Authorised column being included.
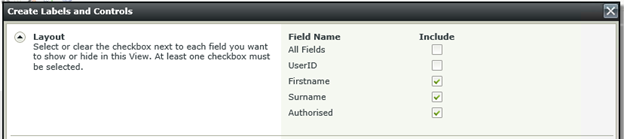
Figure 3 – Generate Smart Object columns
Running the K2 SmartForm View, and adding a couple of records reveals that the values in the Authorised columns are displayed as true and false.
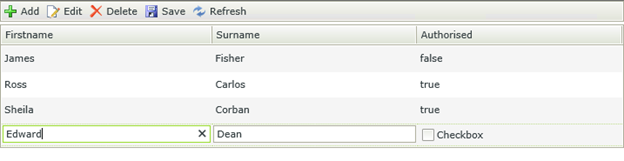
Figure 4 – Authorised values displayed as true and false
It is important to understand that K2 binds the values in each record to an instance of the associated K2 SmartObject. This makes it possible to save the records to the database by referencing the values stored in the K2 SmartObject associated with each record. This means that altering the true/false values in the bound Authorised column would mean altering the values that are saved to the database, and since the database would only accept true/false values, we need an alternative column to display the Yes/No values.
To solve this problem, I have created an additional column in the K2 SmartForms List View control. I still want the column to display “Authorised” in the column header. So in order to distinguish between the two Authorised columns, I have labelled the Yes/No column “Authorised Display Column”, and the True/False column “Authorised Value Column”.
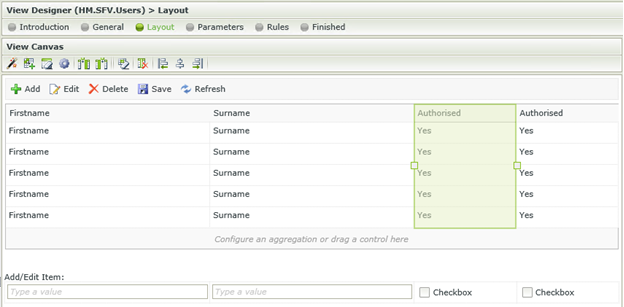
Figure 5 – Displaying both Authorised Columns
Keeping in mind we will be hiding the “Authorised Value Column” from the User and allowing them only to change the “Authorised Display Column”, it is very important that the value from the “Authorised Display Column” be transferred to the “Authorised Value Column”. This is easily achieved by using K2 SmartForm Rules.
Select the checkbox control associated with the “Authorised Display Column” column, and add a new Rule. The Rule will simply state, that when the control’s value is changed, the value of the control will be transferred to the value of another control.
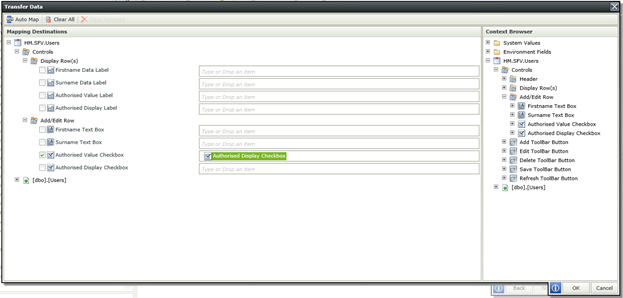
Figure 6 – Transferring the Values from one column to another
Now that the value is being transferred from the “Authorised Display Column” to the “Authorised Value Column” it means that whenever the User changes the value of the “Authorised Display Column” the associated K2 SmartObject will receive the same value. Now we have the freedom to display any value we want in the “Authorised Display Column” without having to worry about the values being sent to the database.
The next step is to use K2 Expressions to convert the True/False values into Yes/No Values and associating the K2 Expression with the “Authorised Display Column”.
We create a new K2 Expression, by selecting the “Authorised Display Column” and opening the K2 Expressions dialog.
First we have to add a Logical Operating to say “If the value is true, return Yes, else return No”.
Figure 7 – If-then-else Operator
Next we have to select the value to be evaluated. Seeing as each record holds its own instance of the K2 Smart Object, we will select the value stored in the “Authorised Value Column”. We also need to add the “Equals true” part of the expression in order to tell the expression what we are evaluating the value against.
Figure 8 – Value = true Operator
Unfortunately certain shortcomings do exist in the K2 system, and sometimes the K2 system will change the “true” value to a “-1” value. Seeing as the “Authorised” value will never be “-1”, the expression will always result in a “false”, and therefore a “No”.
Fortunately there is an easy work around to this short coming. All we need to do is wrap the “Authorised” value in some more logic. First we will convert the value to a String instead of a Boolean, and then we force it to always be lower-case. That way we can compare a “true” to a “true” value, or a “false” to a “true” value.
Figure 9 – To Lower To Text Work Around
Now save the expression (remembering to always give the expression an appropriate name). Associate the expression with the column by selecting the expression in the properties view.
Figure 10 – Select Appropriate Expression
Let’s now run the K2 SmartForm View again and see happens.
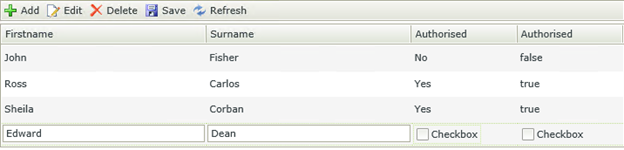
Figure 11 – K2 SmartForm View with working Yes No Values
Success! The K2 SmartForm List View is now displaying “Yes” for “true” values and “No” for “false” values. The final step is to simply hide the “Authorised Value Column” and rename the “Checkbox” control.
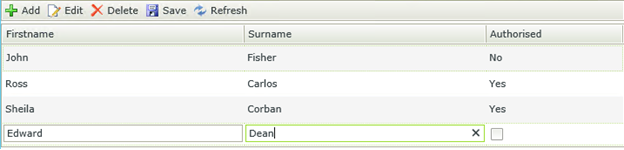
Figure 12 – Final K2 SmartForms List View
About K2 SmartForms
K2 SmartForms is a powerful online forms system packed with enterprise functionality. With a few simple steps and just some basic knowledge of SmartObjects, Rules and Expressions we can create beautiful looking, business friendly SmartForms that are clear, concise and easy to understand even by non-technical business users.