


There is no direct way in Mendix where we can call Java code. To include any custom Java code, we can use Java Actions. This article will cover the steps on how to add and make use of a Java Action. We will be using simple Java program for different mathematical calculation operations – for example, Add, Subtract and Multiply.
Step 01
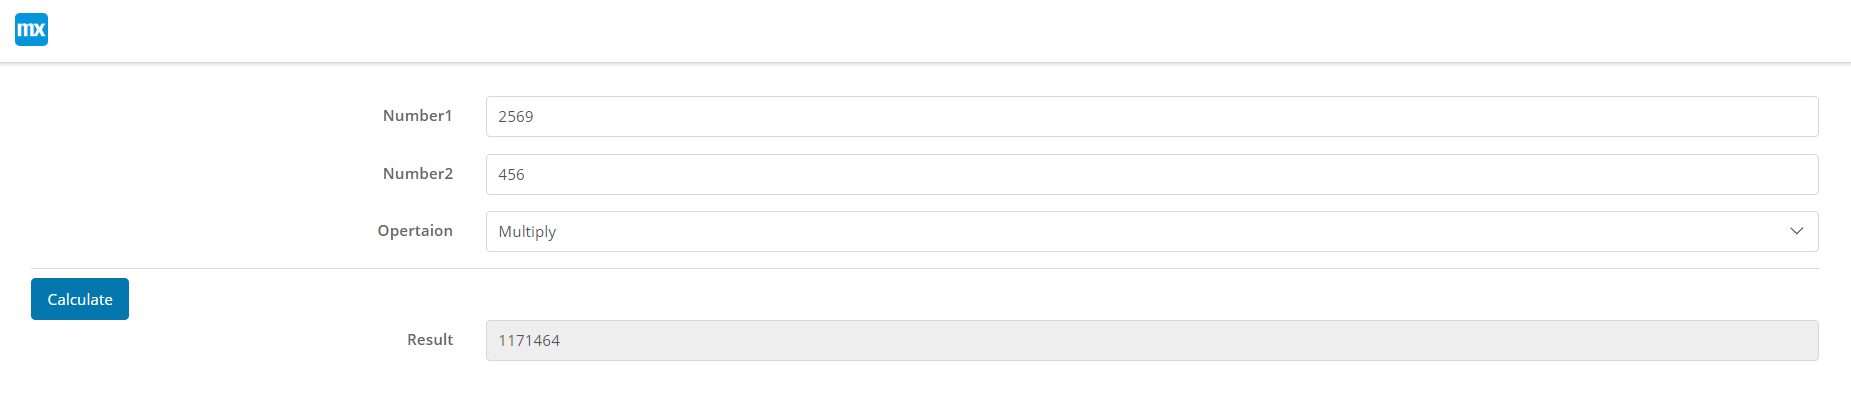
Create a page to input two integer variables and select mathematical operation to be done.
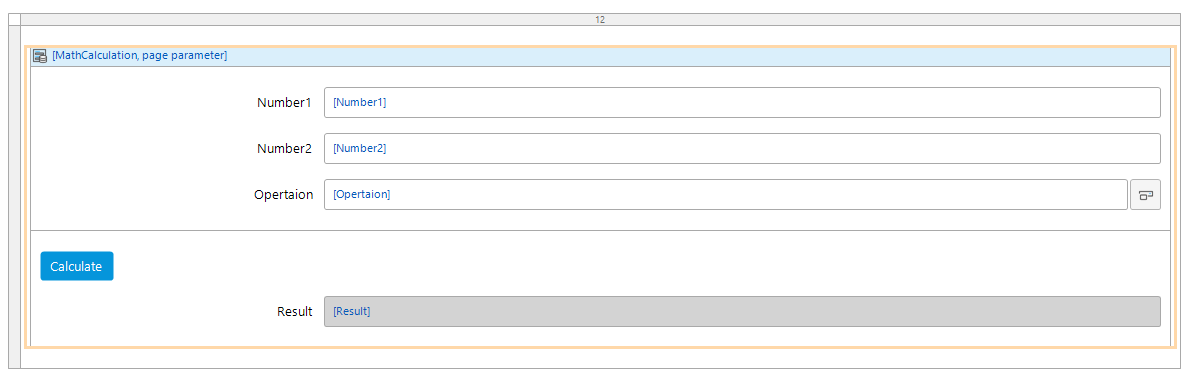 Custom Java in Mendix – Step 1
Step 02
Let’s create a Java Action to execute our Java code which will be executed through a microflow on click of Calculate Button.
Right click on the module Math Operation, click on add other and select Java Action. Name Java Action as MathOperation
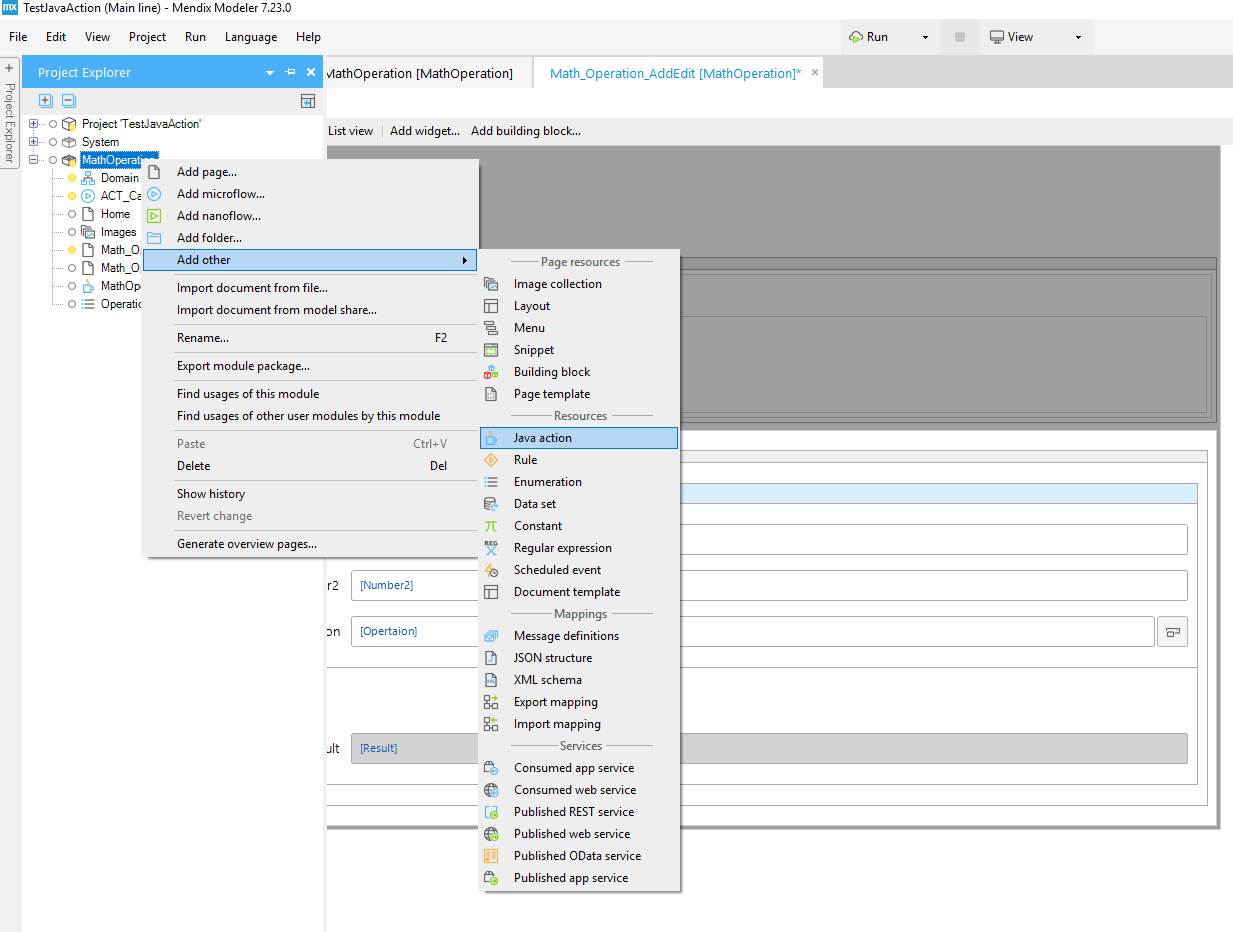 Custom Java in Mendix – Step 2
Step 03
Configure the Java Action
a) Add Parameters under the general tab:
 Custom Java in Mendix – Step 3
b) Check ‘expose as microflow action’ under Expose as microflow action tab in order use the Java Action in microflow:

You can get more in-depth on Java Action properties information HERE
Step 04
The Java Action created should be available under the created category in Toolbox bar.
The next step is to execute the Java Action using microflow. Let’s create a microflow:
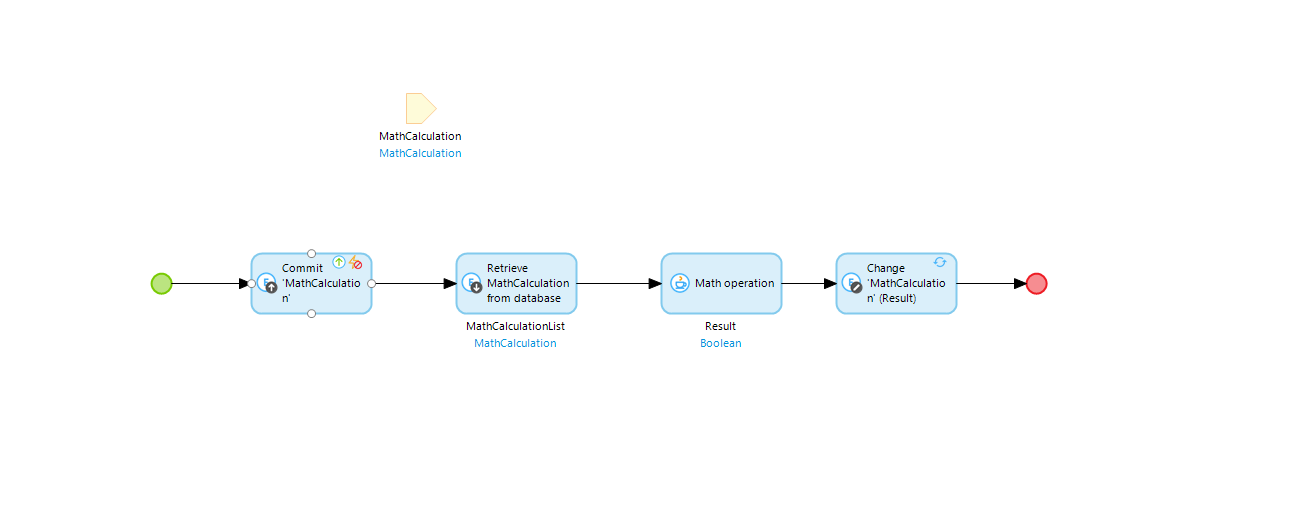 Custom Java in Mendix – Step 4 (a)
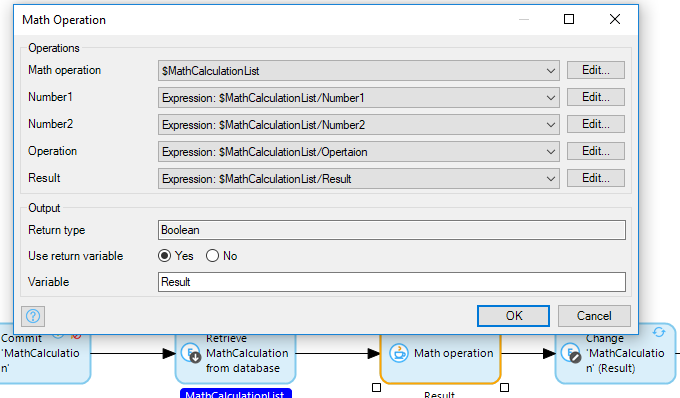
Add an Action activity to call the Java Action and map the parameters and result.
Step 05
In order to proceed with further steps, we need to install eclipse to write our custom Java code.
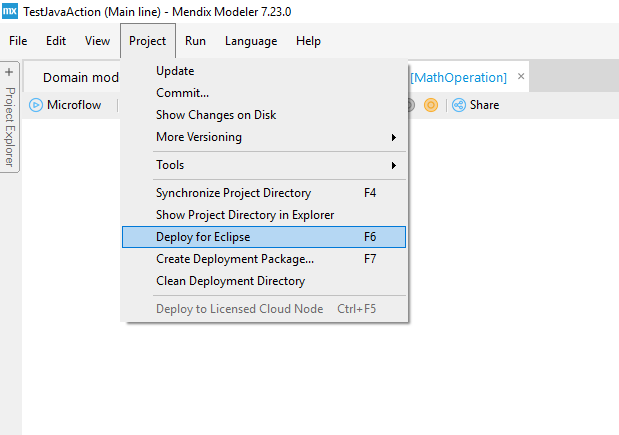
Step 06
Deploy the solution for Eclipse by clicking on the ‘Deploy for Eclipse’ under project:
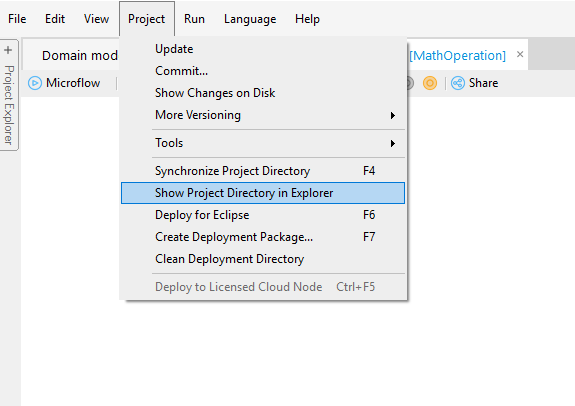
Step 07
Click on Show project directory in explorer:
 Custom Java in Mendix – Step 7 (1)
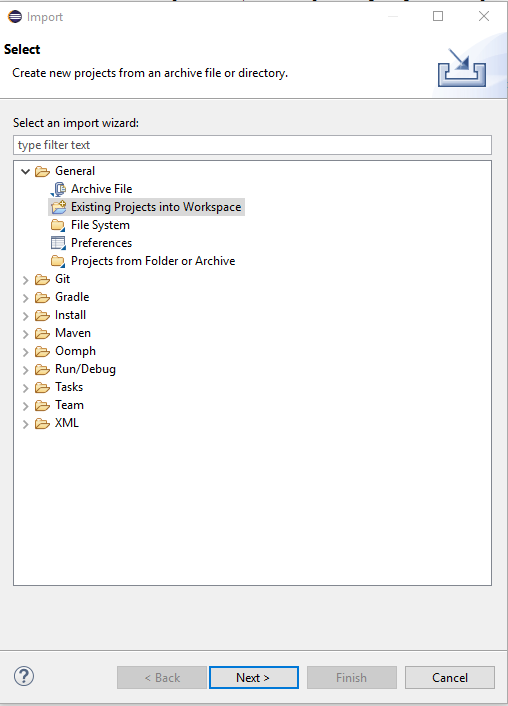
Import the project in Eclipse…
 Custom Java in Mendix – Step 7 (2)
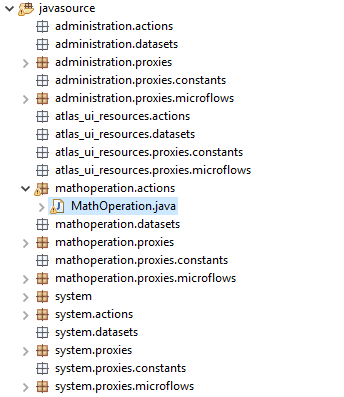
Go to Java file under mathoperation. Actions:
 Custom Java in Mendix – Step 7 (3)
Step 08
Locate the placeholder with commented statements (Begin user code and end user code):
 Custom Java in Mendix – Step 8 (1)
You can write your java code here. The modeller will never override your code placed between these two commented statements.
Once done, run the project from modeller and try executing your code from screen:
 Custom Java in Mendix – Step 8 (2)