


Overview
This blog post illustrates how to generate a custom solution in K2 to generate a Pdf from a Word document in SharePoint, without making use of 3rd party components.
K2 provides the capability to generate a Pdf out-of-the-box – but is limited to a web page by supplying its URL as well as a smart form. In order to generate a Pdf on the fly for a Word document within SharePoint, WAS or Word Automation Services is utilized to help solve this requirement.
K2 Automated Testing Software
BenchQA allows full test automation of K2, including fully automated K2 SmartForms and K2 Workflow testing. It promotes test driven development for K2 and ensures continued quality assurance for K2 solutions. Easily apply changes to test cases to accommodate changes to K2 apps and ensure all apps are regression tested to avoid defects and assure continuous quality.

Components
The components involved are:
- Word Automation Services service application
- SharePoint server-side object model custom code to access WAS
- Web service to expose logic as public method
- Custom K2 Service Type and Instance to medium web service
- Custom K2 Smart Object to expose functionality in K2 context
- K2 workflow process to apply functionality via Smart Object method call
- SharePoint document library to host K2 workflow process and documents to generate Pdf’s for
Configuration
The configuration involves:
- Word Automation Service Application
- Open Central Administration
- In section Application Management, select option Manage Service Applications

- On the ribbon bar, select the New drop down button and select option Word Automation Services
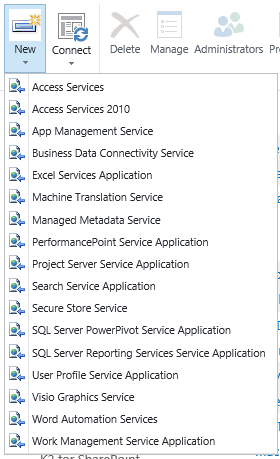
- Complete the wizard to create a new Word Automation Services service application by specifying a name, application pool, security account, database server and database as well as authentication type

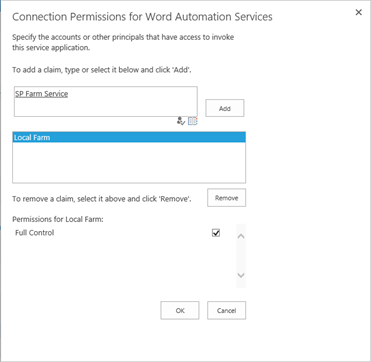
- Assign full control permission on the service application to the desired account, usually the SharePoint farm account using the Permissions ribbon bar button
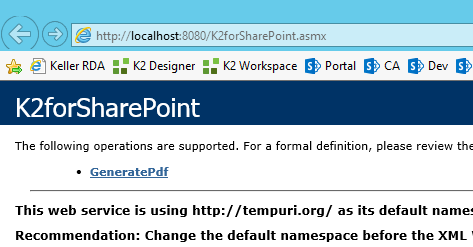
- Web Service
- Create a service of your choice e.g. WCF or ASMX to host the custom functionality
- Add the required referencing assemblies for:
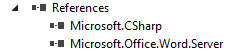
- Add the required references from the assemblies to the service

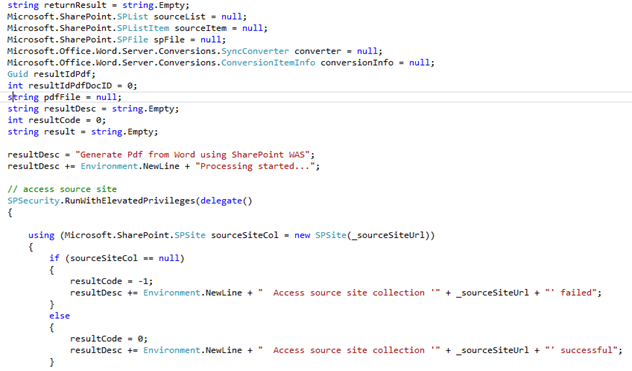
- Create a public method with necessary signature to accommodate a document location and details in SharePoint
![]()
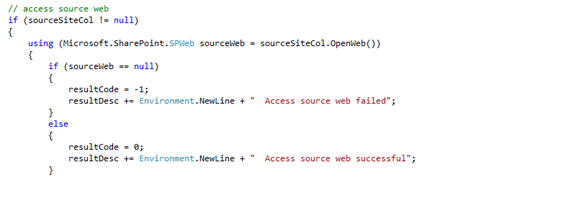
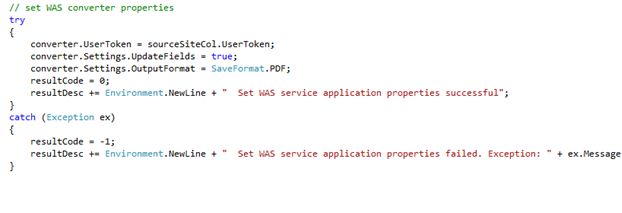
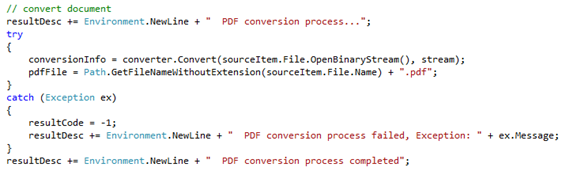
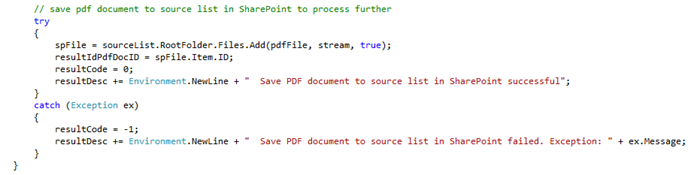
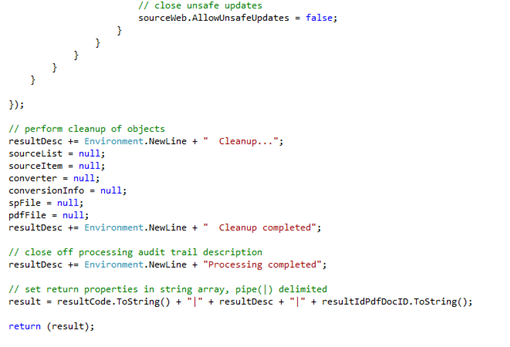
- Add the code logic to access the Word Automation Services service application of SharePoint and document to be converted


- Publish and host the service in your desired hosting software, e.g. IIS
- Test the web service method
SharePoint Configuration
- Create a document library to host the workflow and documents to be converted
- Upload documents for testing purposes
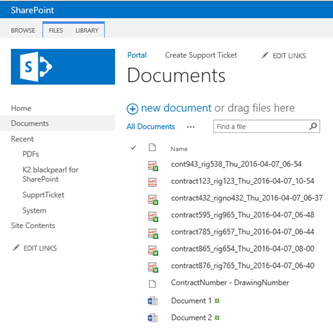
- Prep the new library for K2 integration by clicking on the Library ribbon bar link and selecting the Application button in the K2 category
- Select the option to create smart objects
Custom K2 Service Type
- Open the K2 SO Tester Tool
- Create a new service type using the option Register Service Type on the top main menu bar
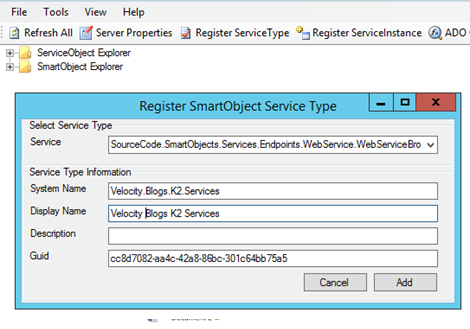
- For field Service, select the appropriate option depending on the type of service that was created. In this case a ASMX web service was created, thus WebService broker service is selected
- Specify a value for field System Name
- Specify a value for field Display Name
- Click on Add
- Verify that the new custom service type was created

Custom K2 Service Instance
- Open the K2 SO Tester Tool
- Find and select the service type previously created Velocity IT Blogs K2 Services
- Create a new service instance using the option Register Service Instance on the top main menu bar
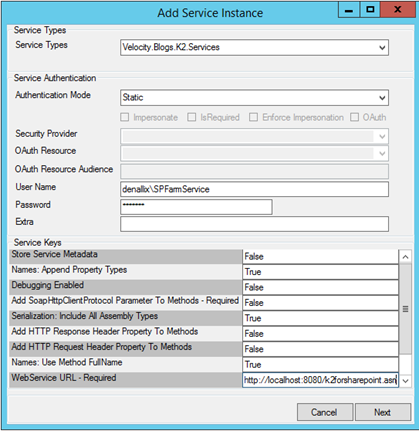
- For field Service Types, select the previous created service type
- For field Authentication Mode, select your desired mode. This example used Static
- For field User Name, provide the SharePoint farm account
- For field Password, provide the SharePoint farm account password
- For field WebService URL, provide the URL that points to the custom created web service
- Click on Next

- Specify a value for field System Name
- Specify a value for field Display Name
- Click on Add
Custom K2 Service Instance Smart Objects
- Open the K2 SO Tester Tool
- Find and select the service instance previously created Velocity IT Blogs K2 Services Instance
- Create the necessary smart objects by selecting the previous create service instance, right click and select option Create SmartObjects
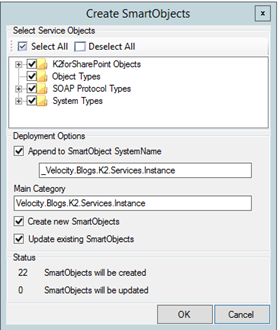
- Accept all default selections and options and click on OK
Workflow Process
- Open K2 Studio
- Create a new default workflow process
- Create new process data fields to accommodate the document in SharePoint as well as the name for the created Word Automation Services service application
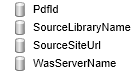
- Assign a default value to data field SourceSiteUrl, e.g. https://portal.denallix.com
- Assign a default value to data field SourceLibraryName, e.g PDFs
- Assign a default value to data field WasServerName, e.g Word Automation Services
- Add a single activity to the process and provide a name for it, also connect it to the Start activity

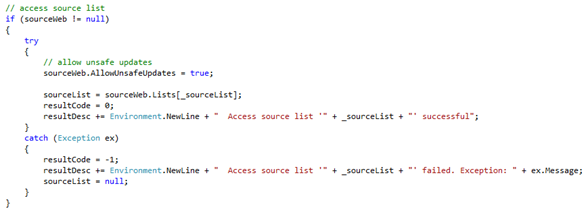
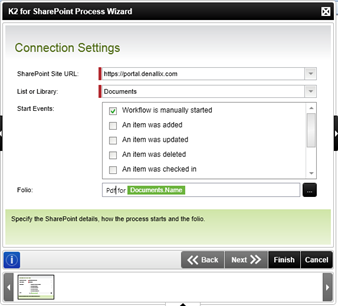
- Integrate SharePoint to the process by adding a SharePoint 2013 Process Wizard to the Start activity
![]()
- Specify a values for the SharePoint 2013 Process Wizard, and click on Finish
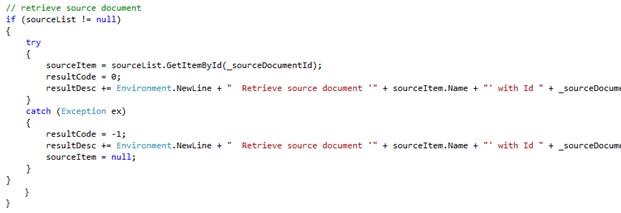
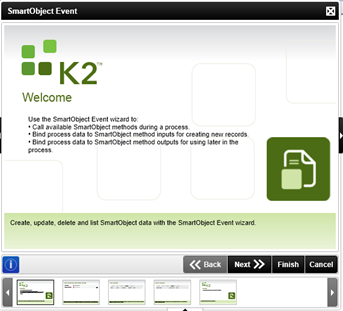
- Add a smart object event to the activity, and complete its wizard configuration
![]()
- Map the smart object event to the method exposed on the custom service instance created previously, integrating with the custom web service
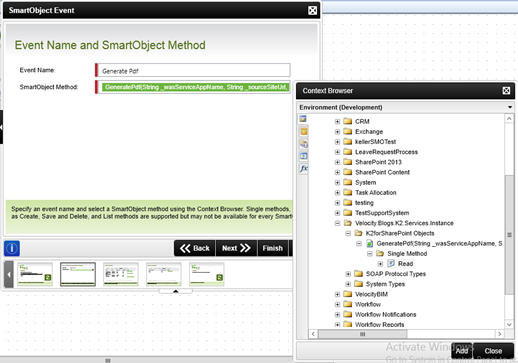
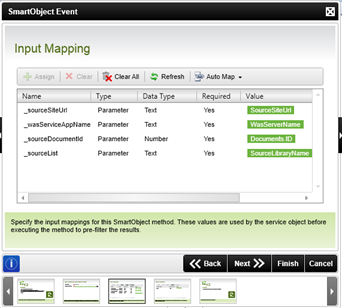
- Map the input properties using the process data fields created previously
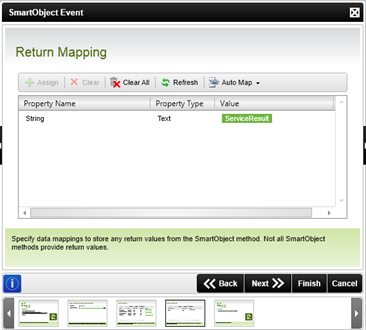
- Map the service call result back to a process data field to interpret for next actions
- Complete the wizard by click on Finish
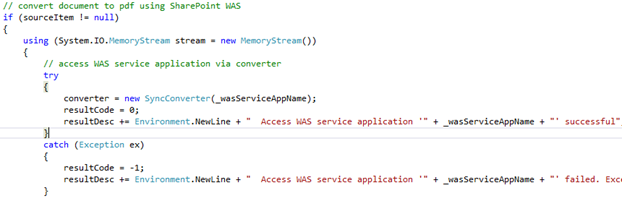
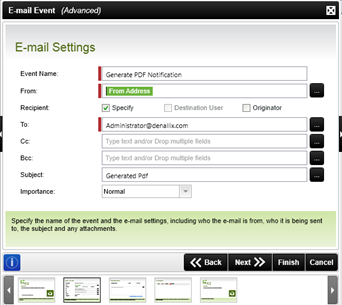
- Add an email notification event to the activity, and complete its wizard configuration
![]()

- Provide the email settings configuration
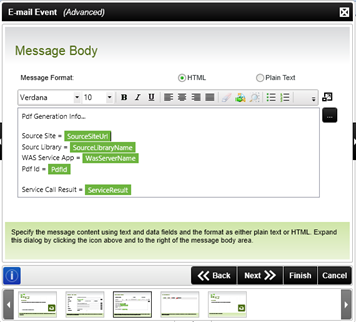
- Provide the message body configuration, display the process data fields created and populated
- Click on Next to advance to the Attachments screen which may be ignored, click on Next again and then on Finish to complete the wizard configuration

- Save and deploy the process
- Assign the necessary permissions on the process in K2 Workspace